How to Configure Outlook OAuth Authentication for Email Integration in Invent ERP
Learn how to connect Microsoft Outlook services securely and configure email authentication within Invent ERP.
OAuth is a standard for authorisation in the field of technology, which allows users to authorise an app or service to sign in to another without revealing sensitive information such as usernames or passwords. This article will detail the process of Outlook OAuth authentication.
Step-by-Step Process
-
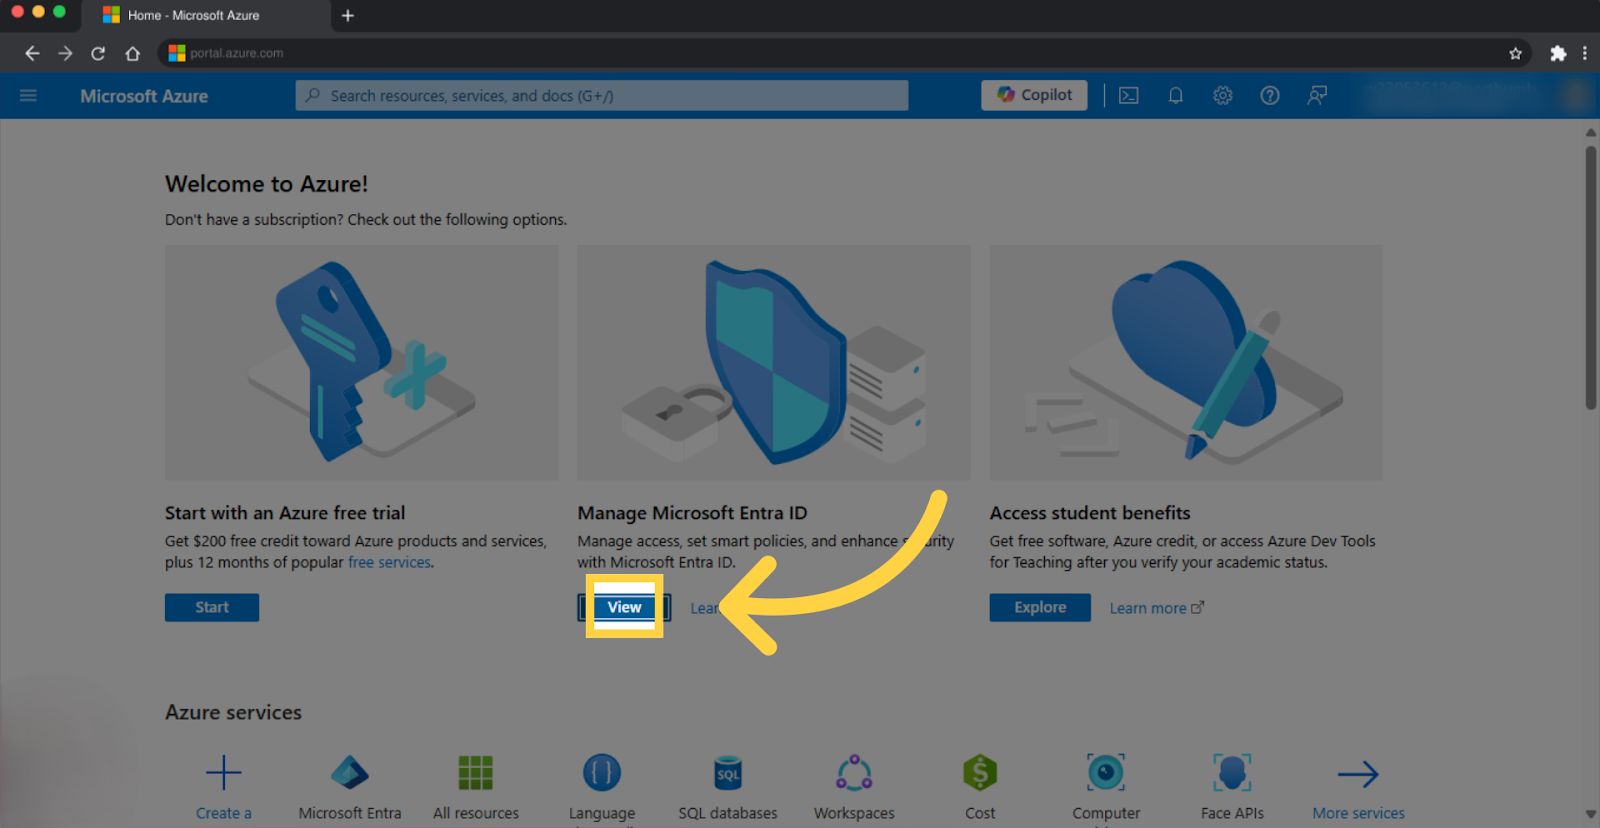
Sign in or create an account on Microsoft Azure
-
Click on View
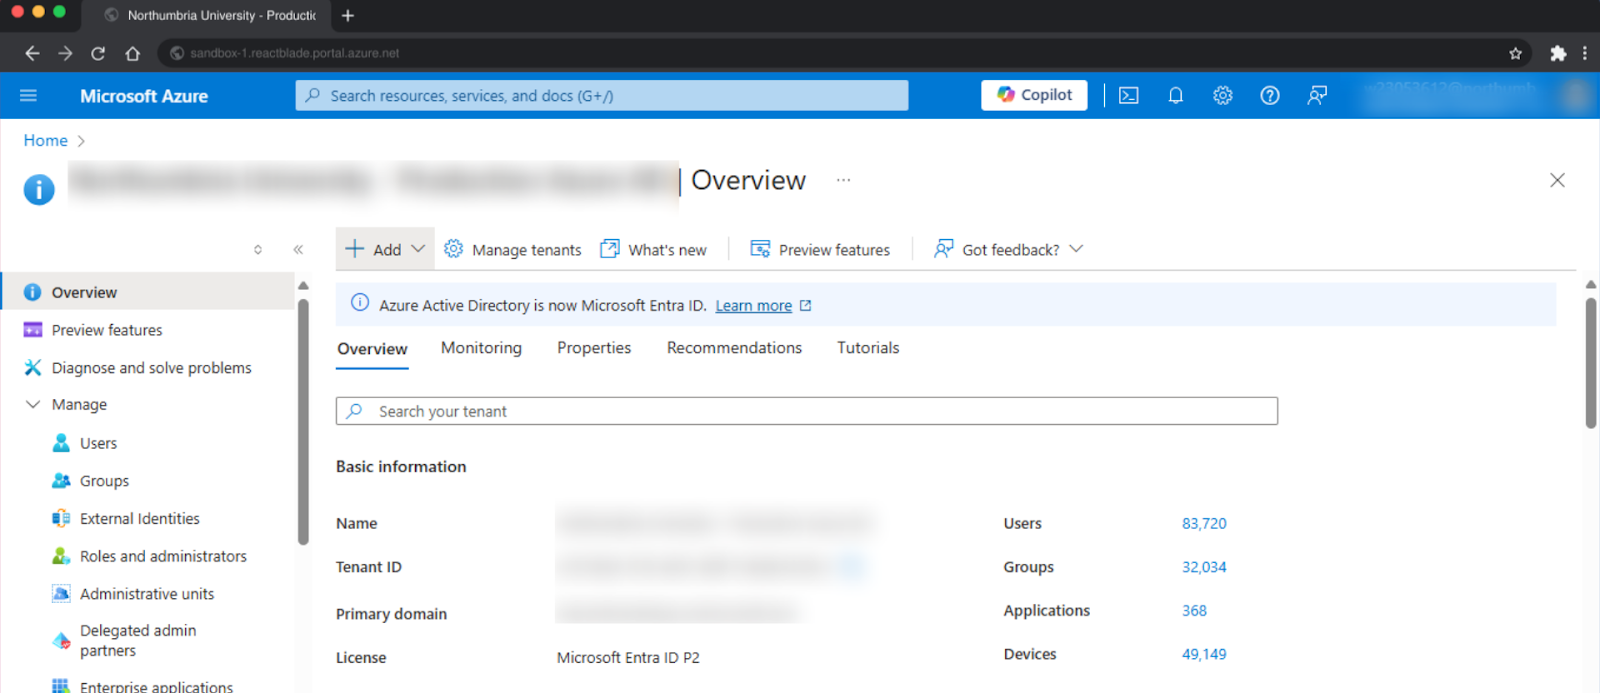
- You will be redirected to this page
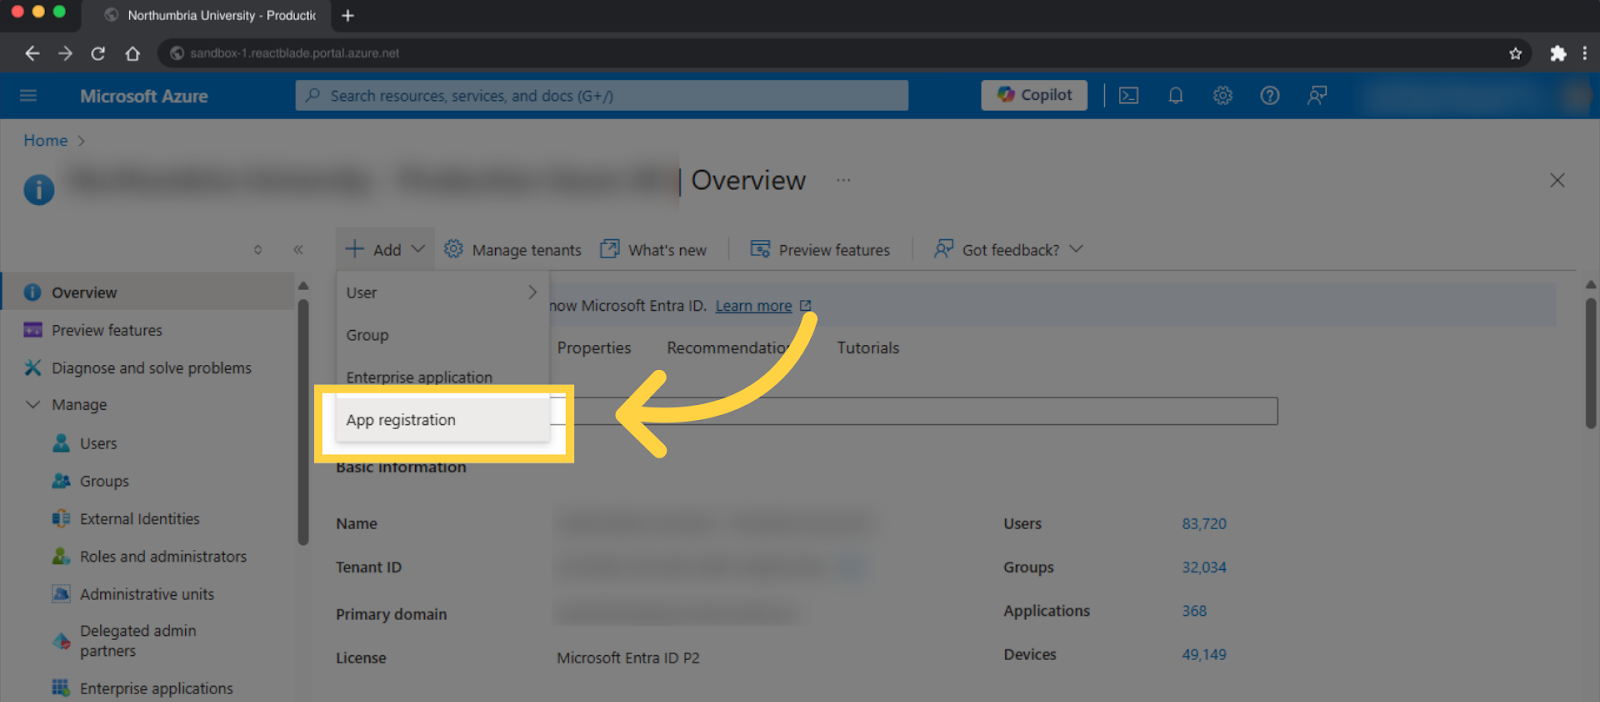
- Click on Add
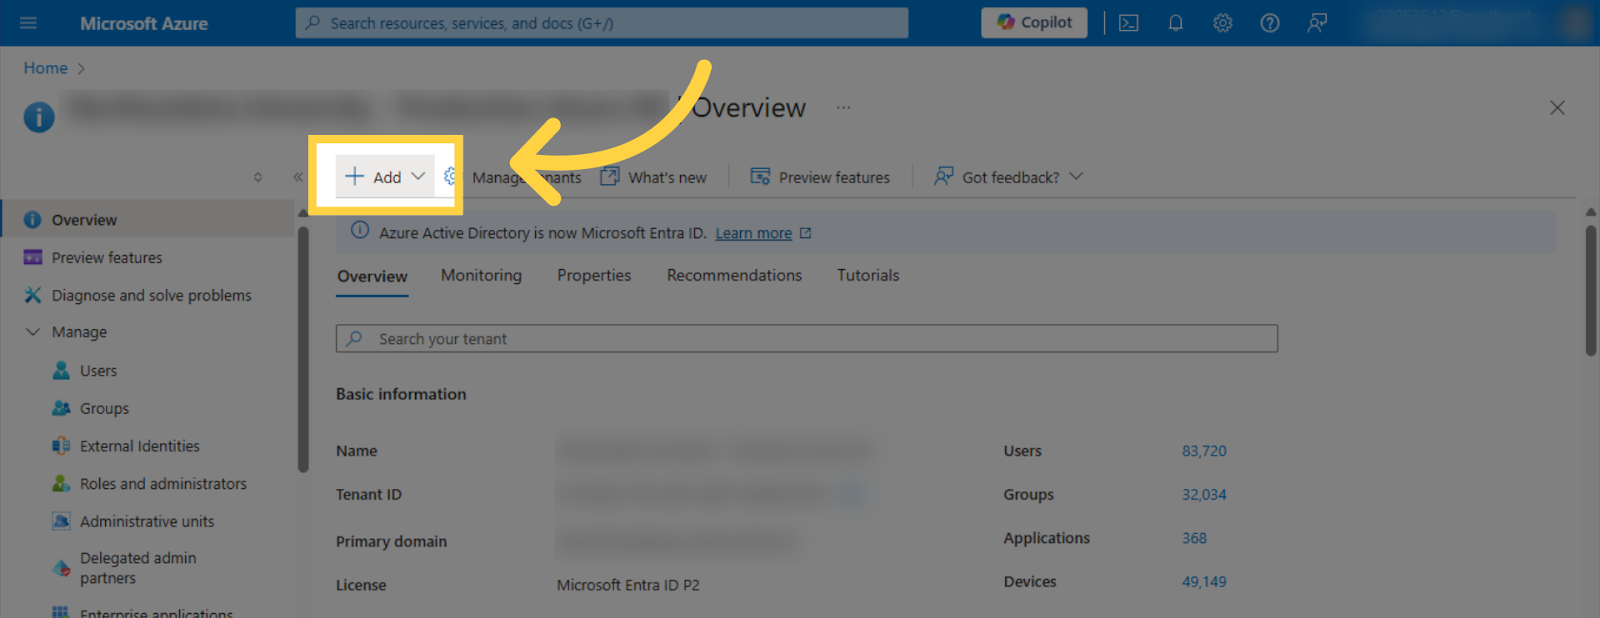
- Click on App registration
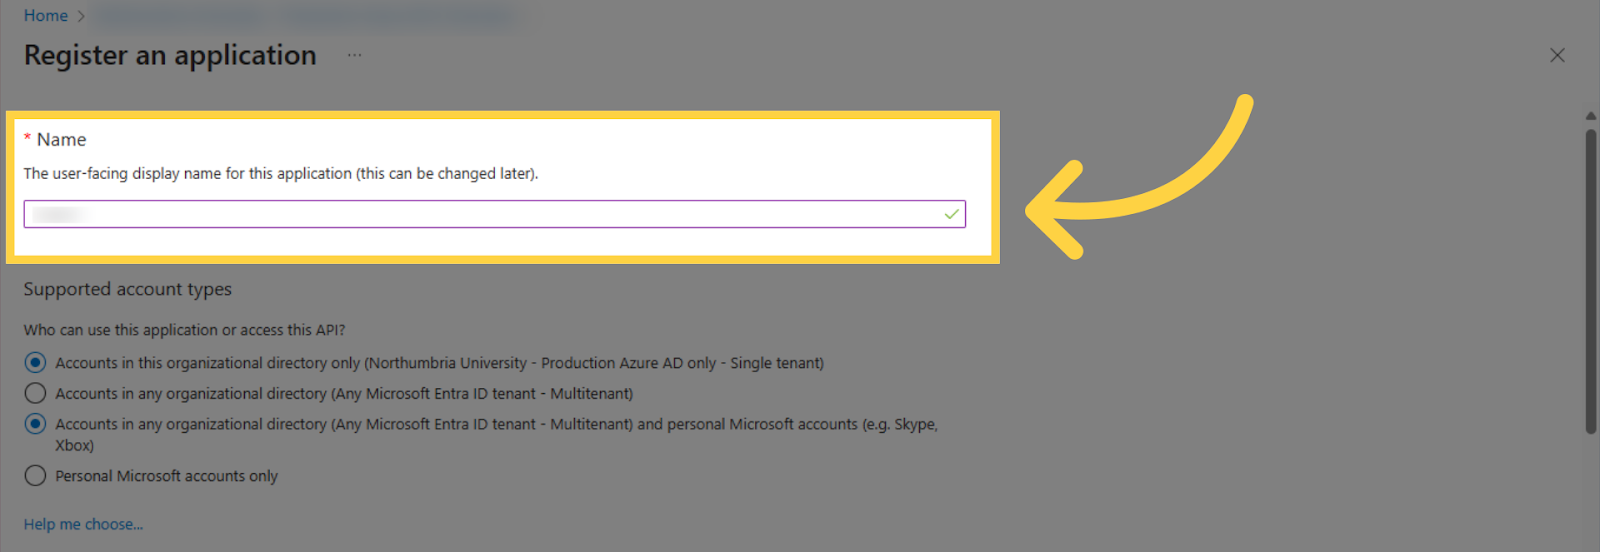
- Next fill in the name field
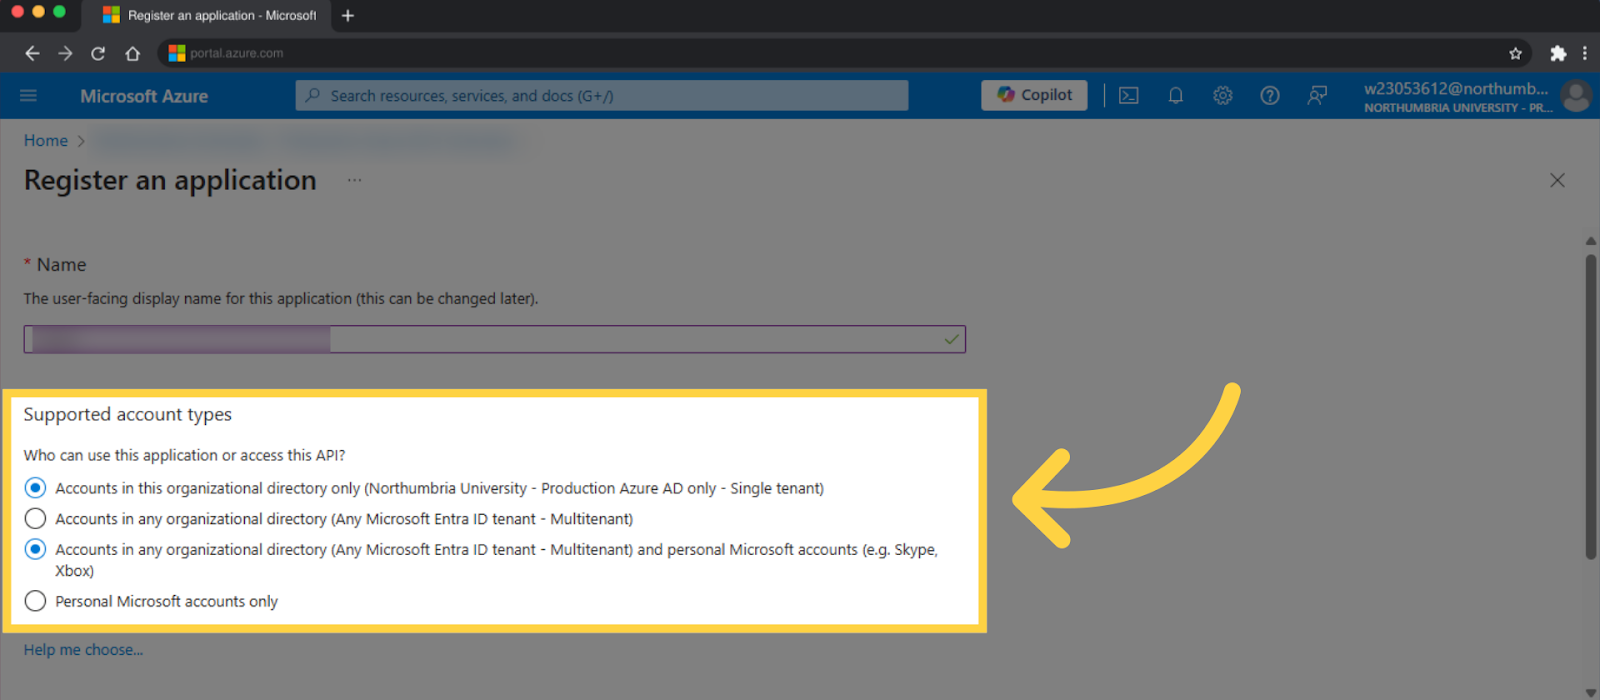
- Choose a Supported Account Type
Navigate to Invent ERP
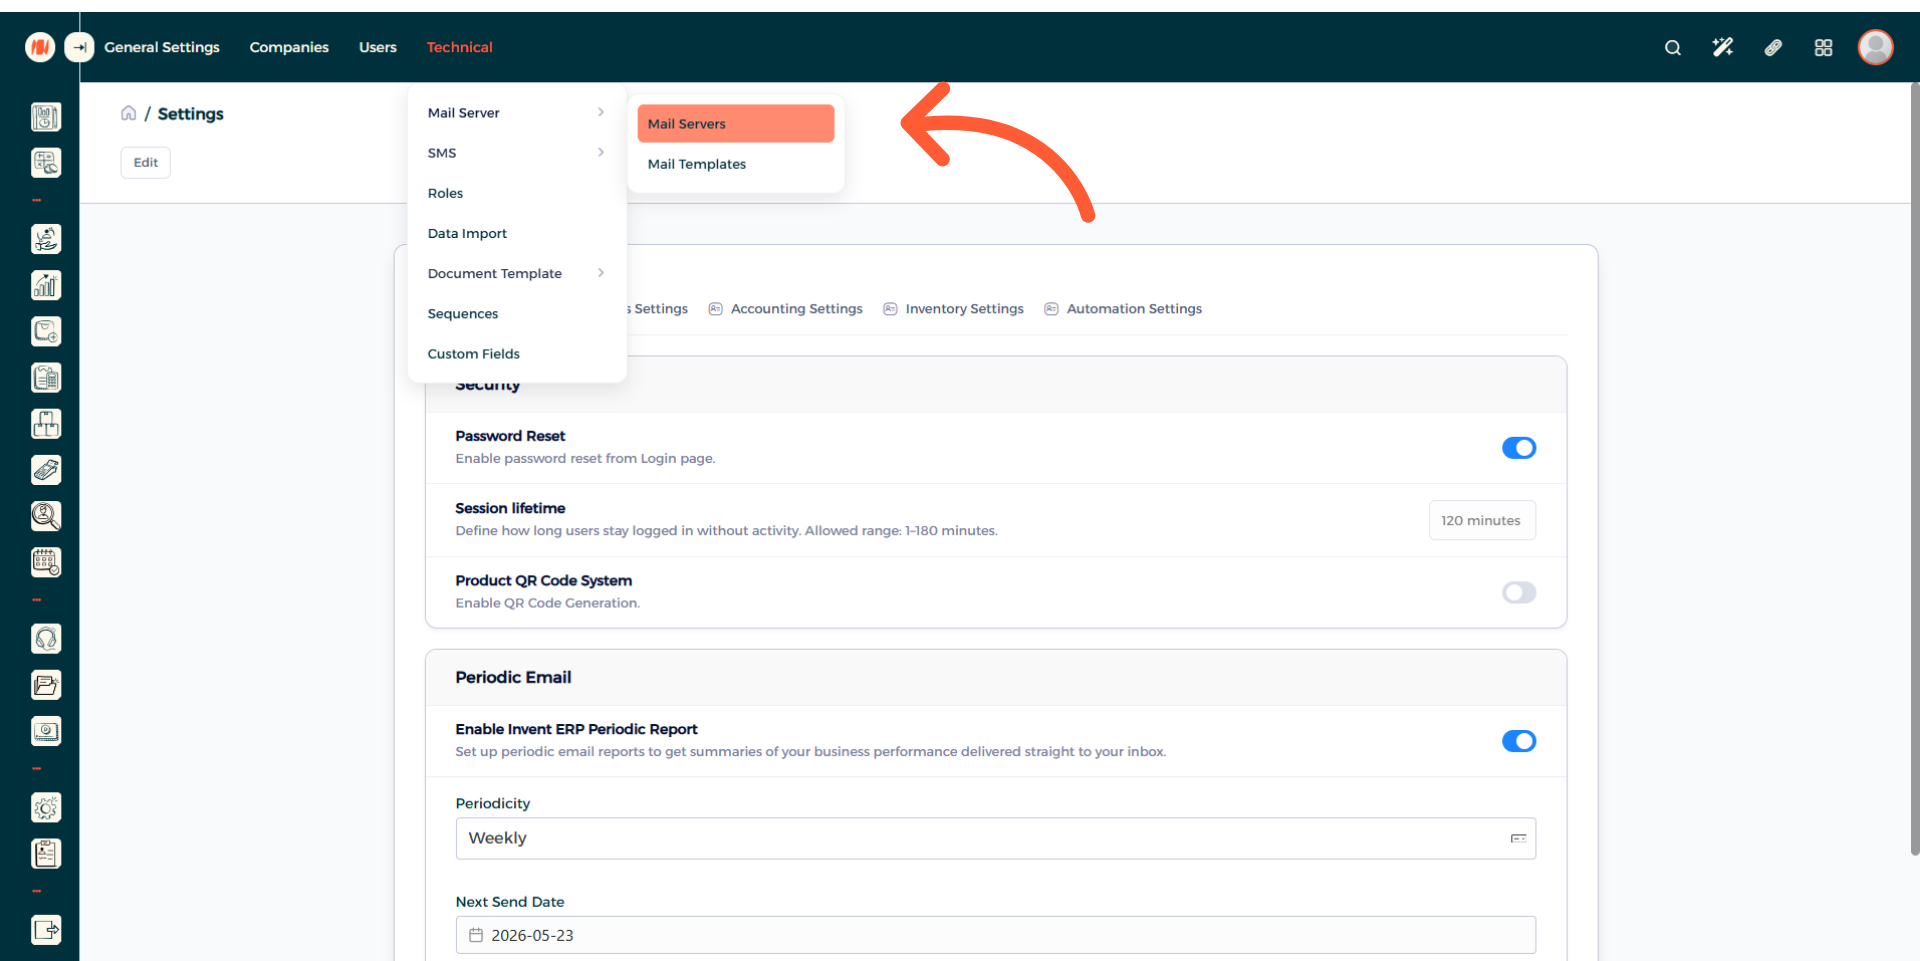
- Using the left sidebar menu, under Configuration select Settings

- Then click on Technical then choose Mail Server then Mail Servers.
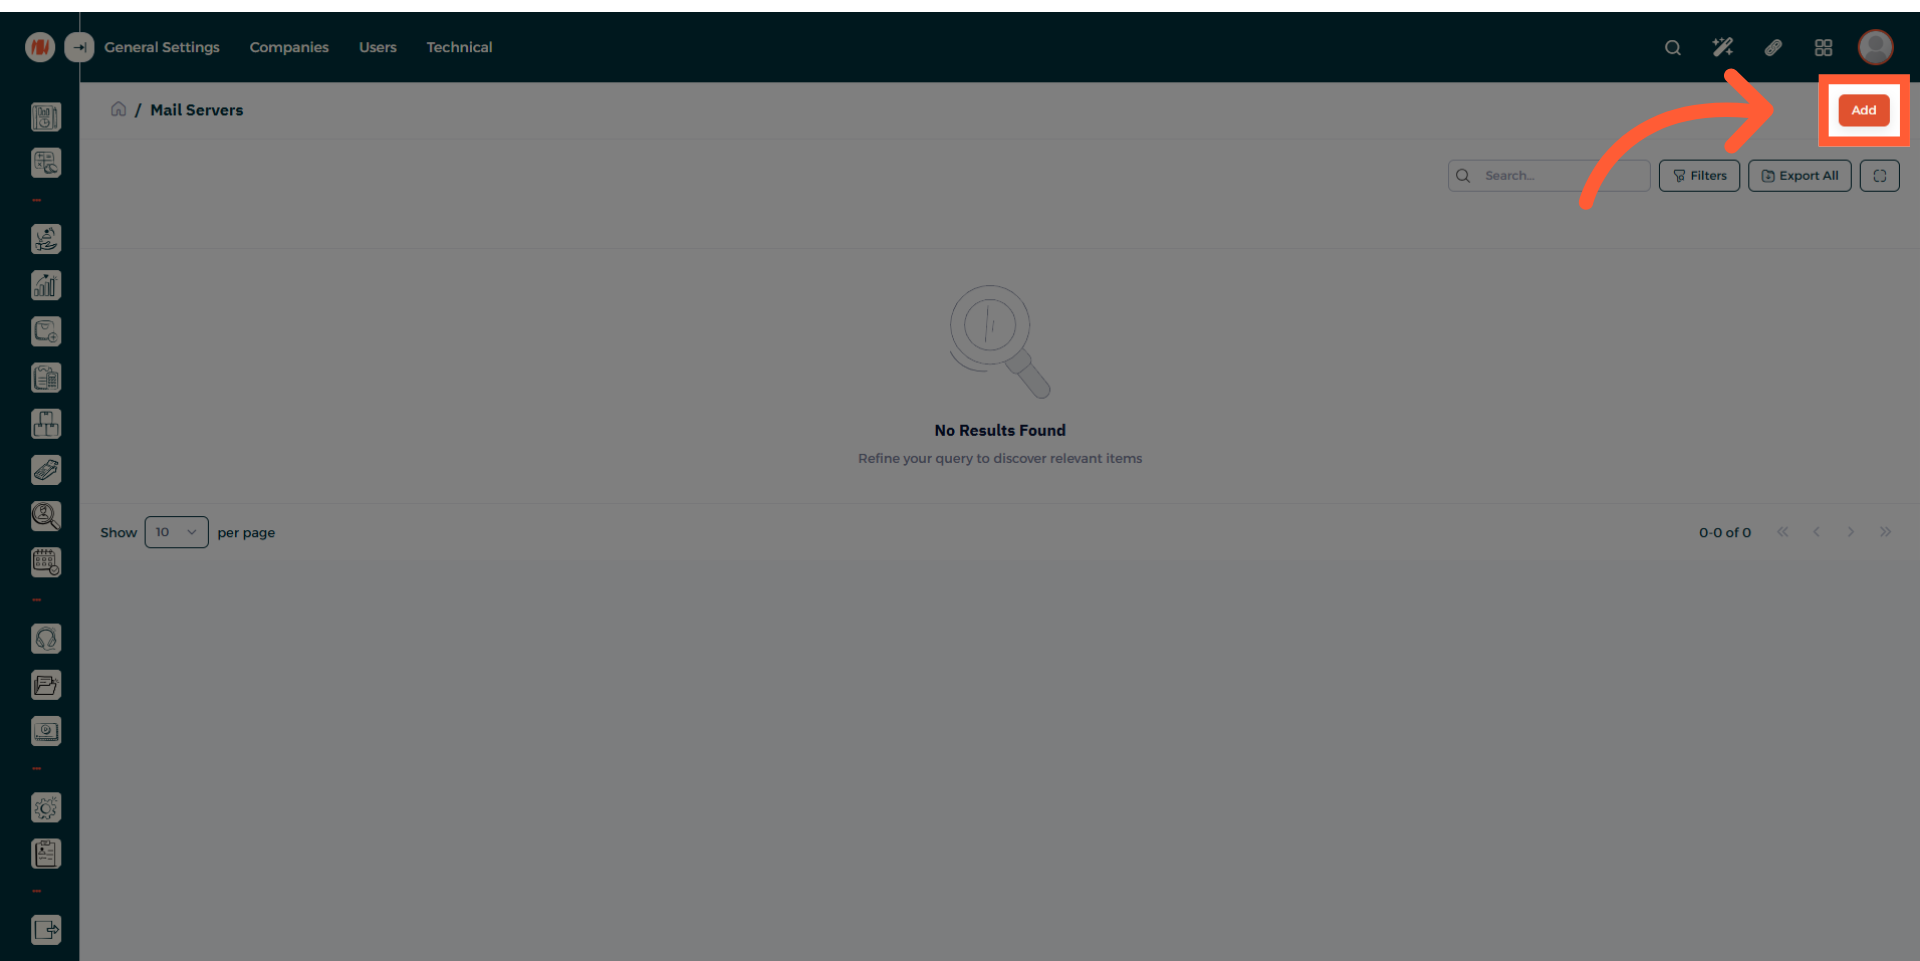
- Press on Add in the top right corner.
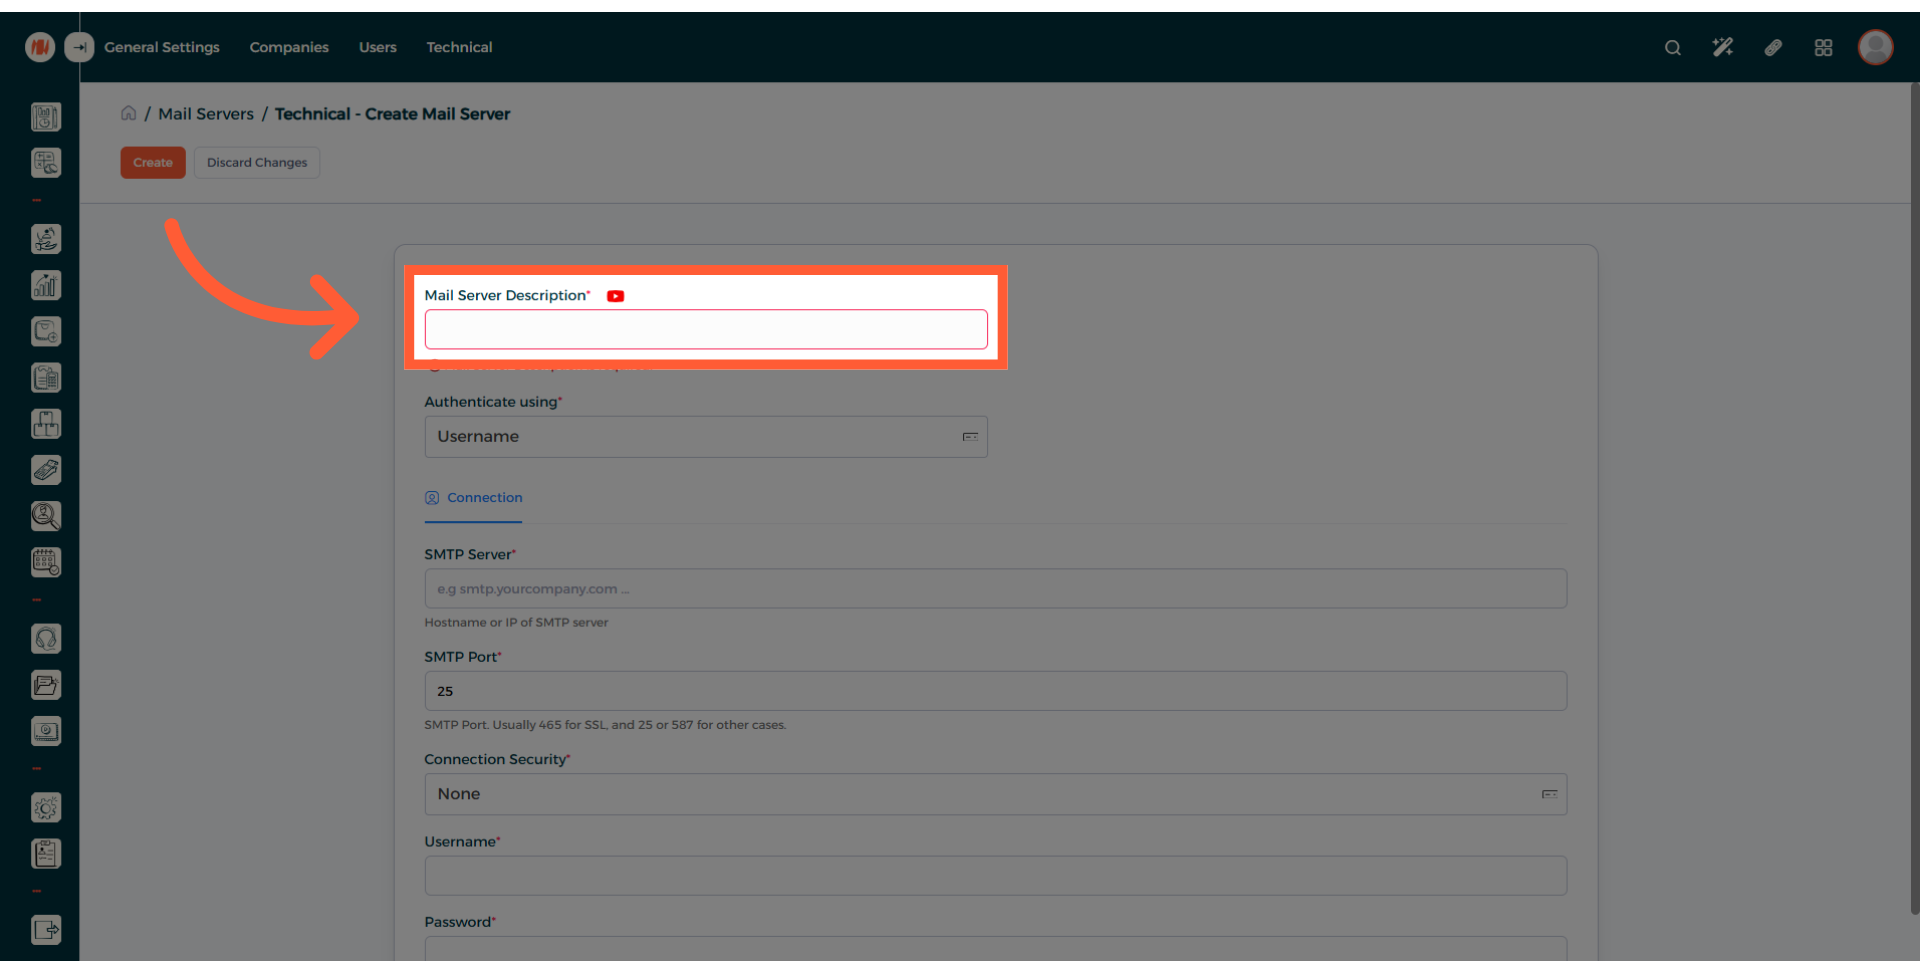
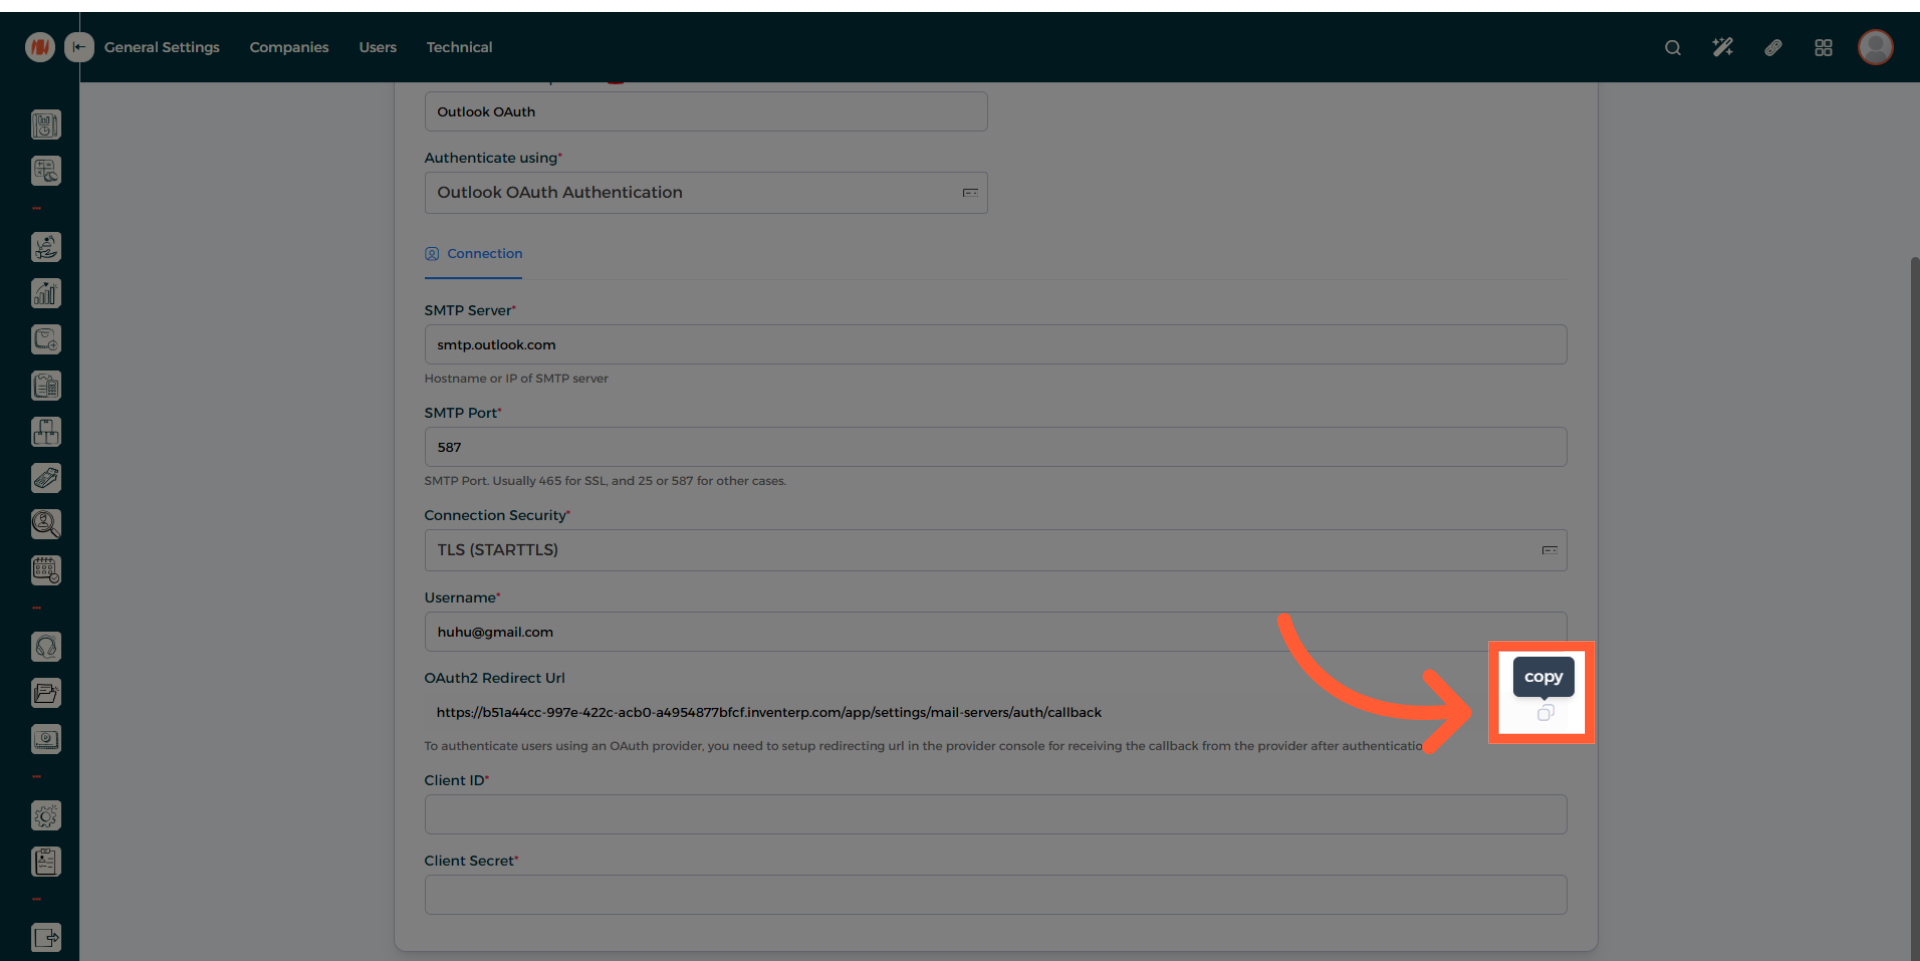
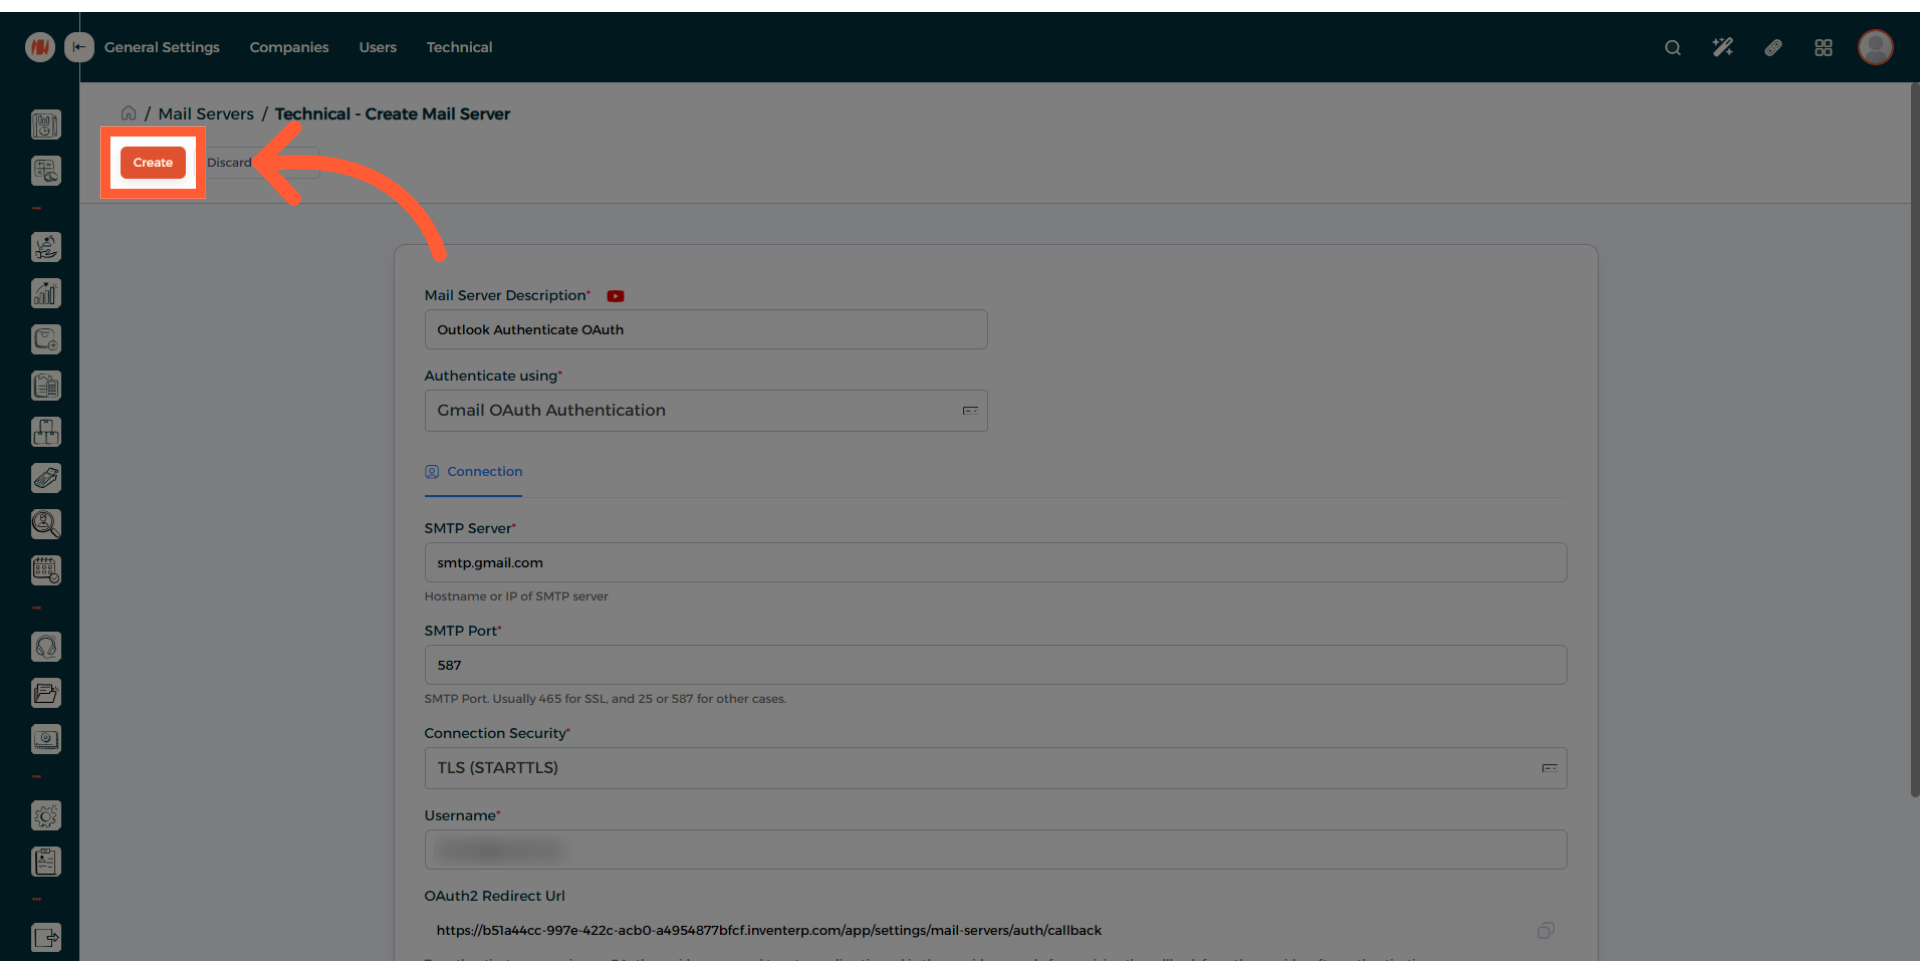
- Fill in the Mail Server Description field
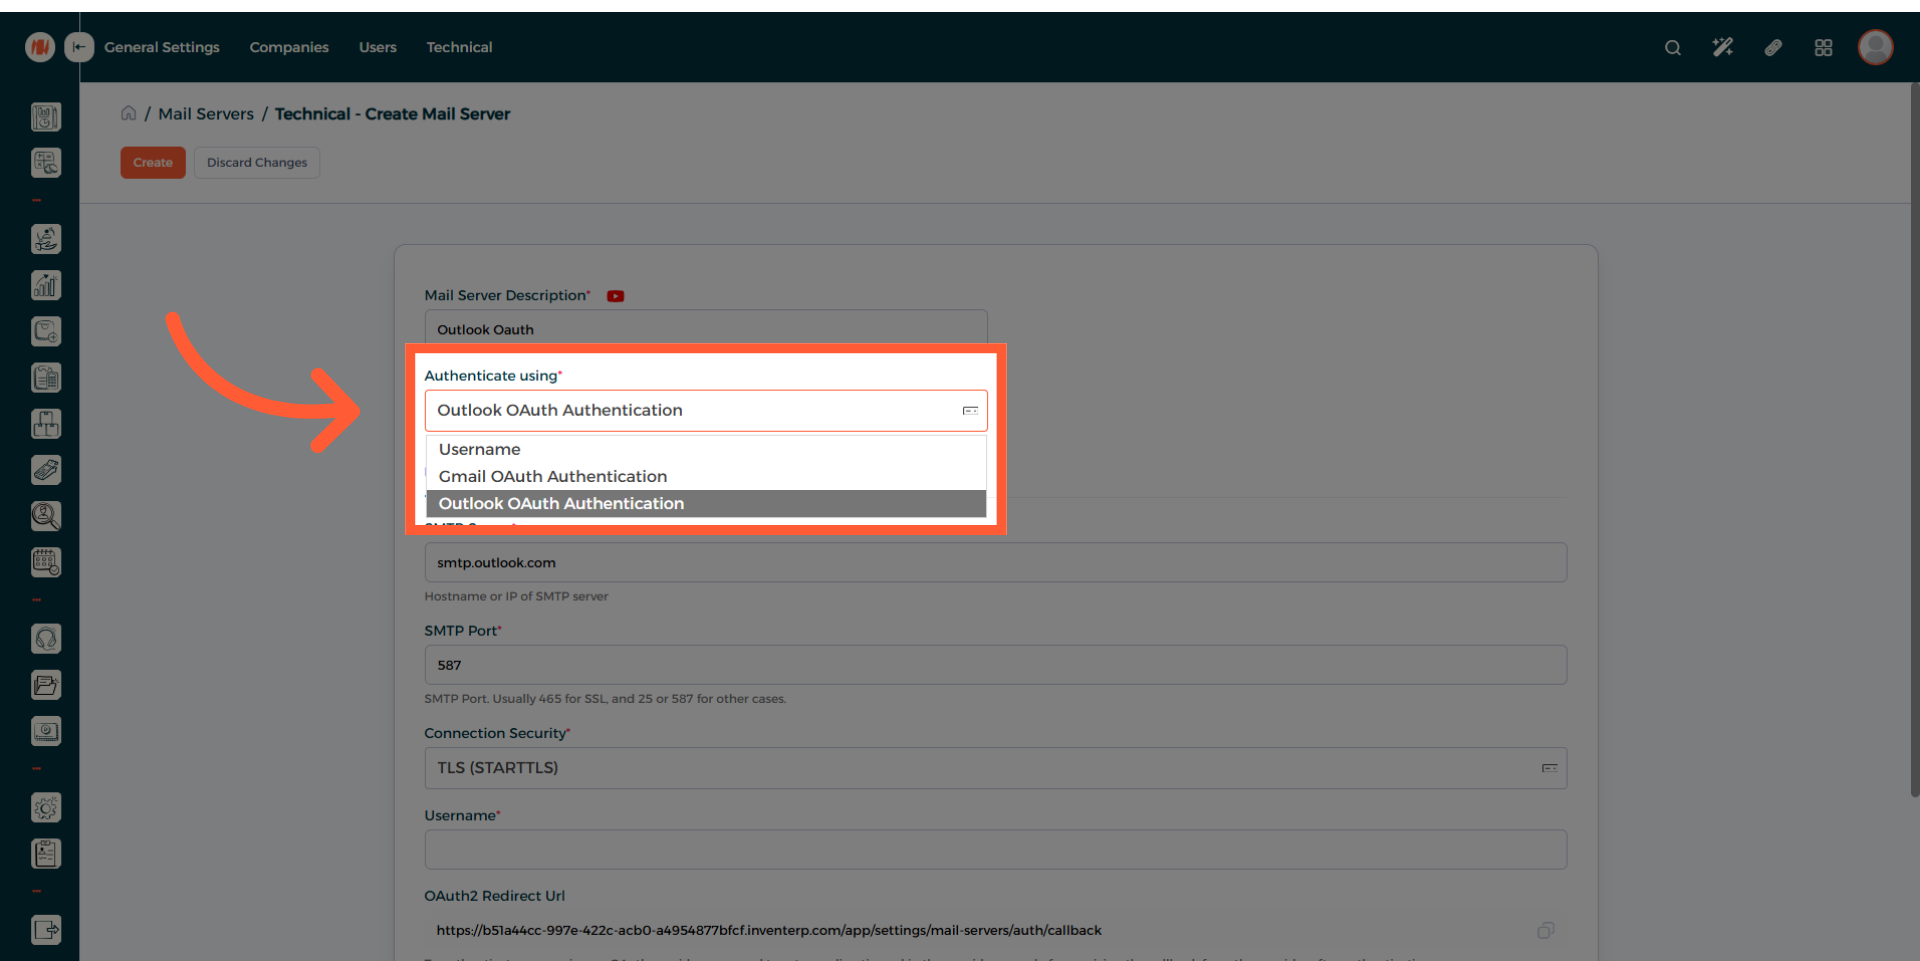
- Choose Outlook OAuth Authentication in the Authenticate Using drop-down menu
- Fill in the Username field with the email address you used on Microsoft Azure
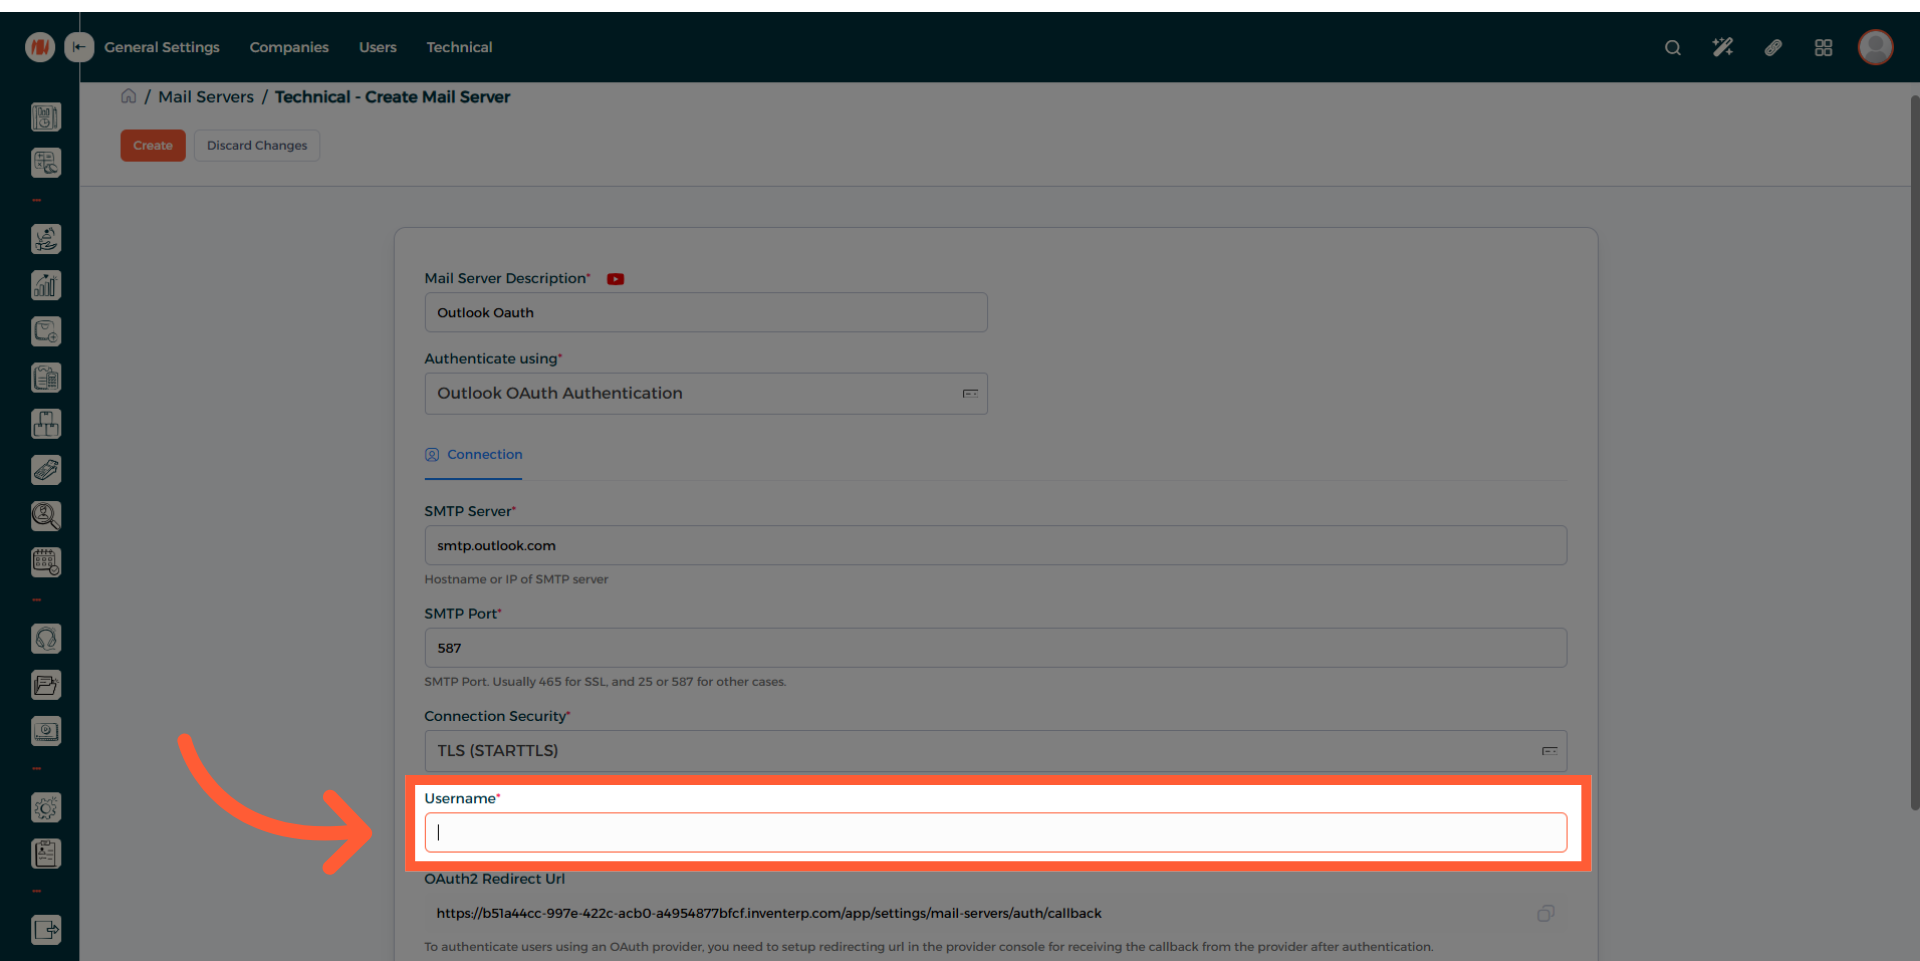
- Copy the OAuth2 Redirect Url
-
Navigate back to Microsoft Azure
-
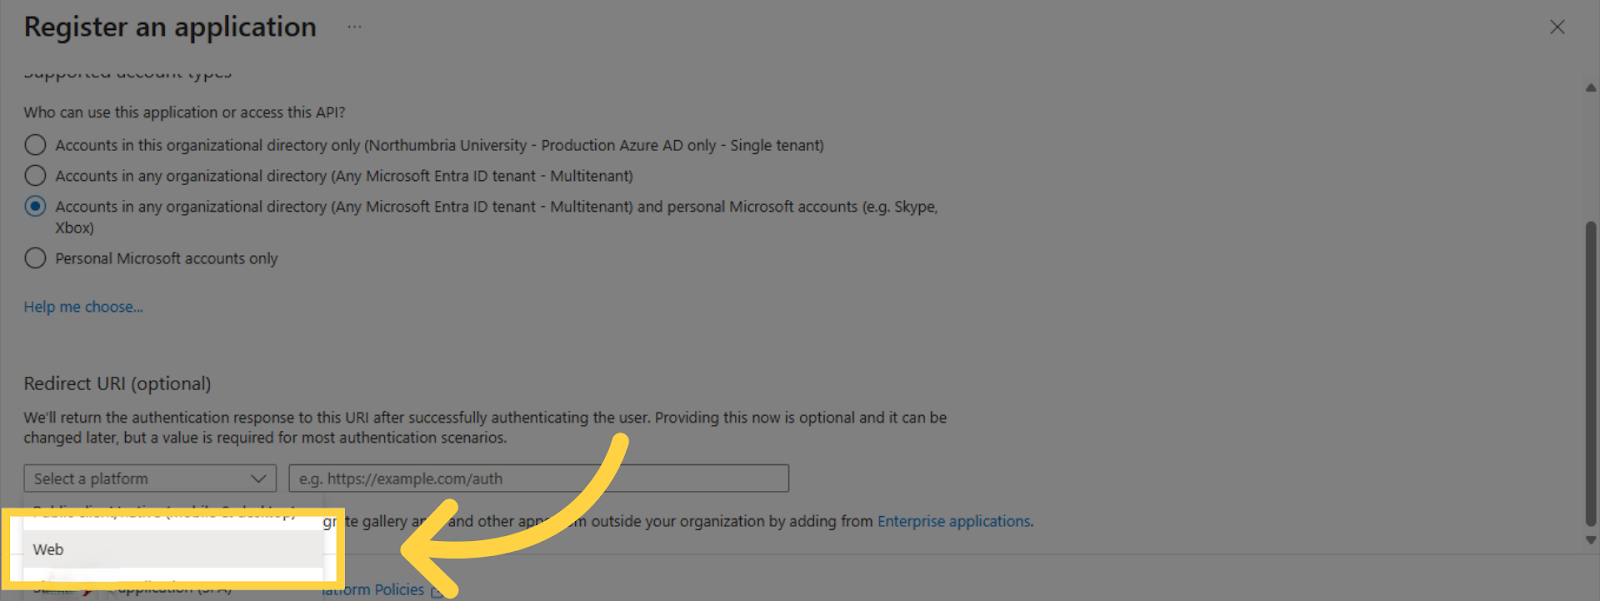
Click on Select a platform and select the Web option
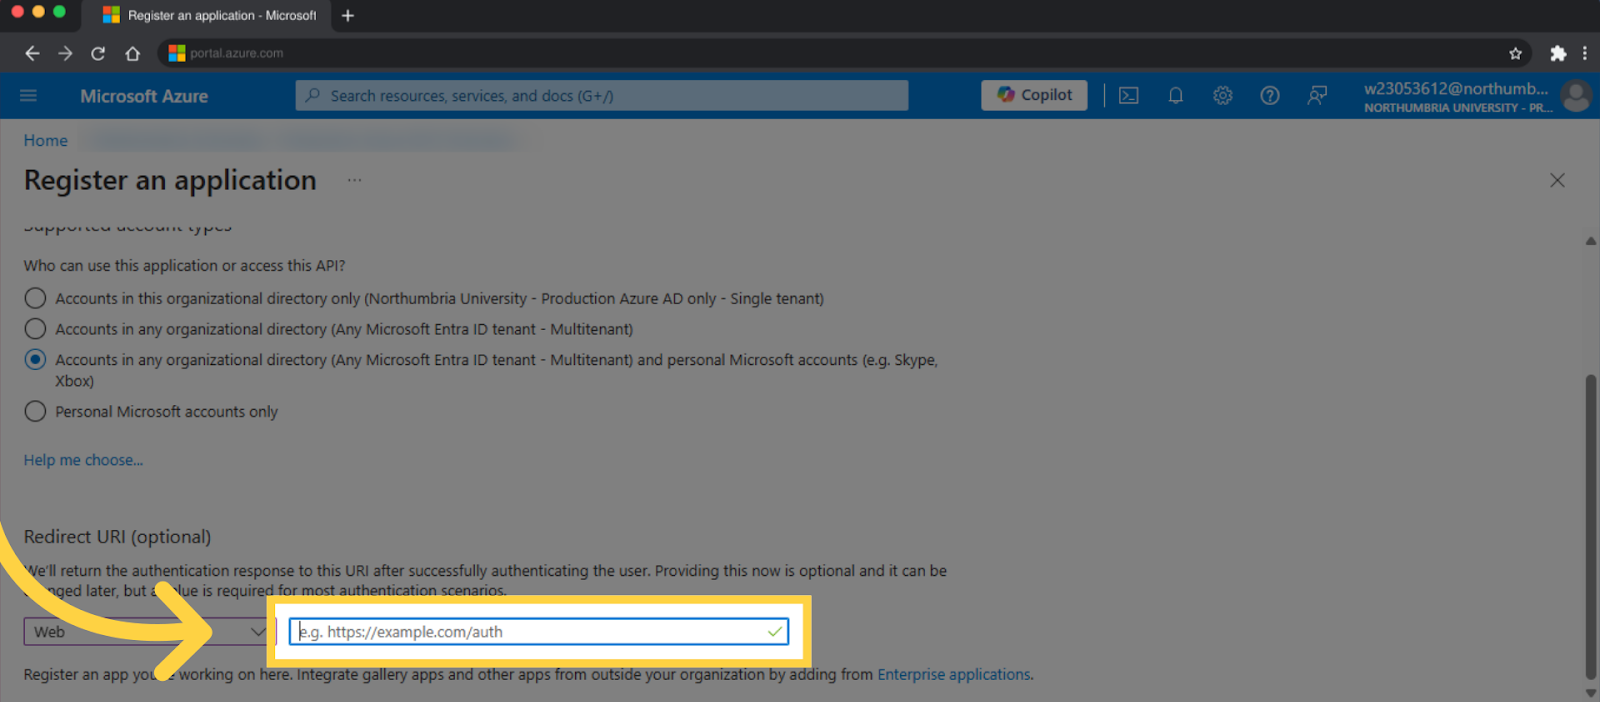
- Paste the OAuth2 Redirect Url
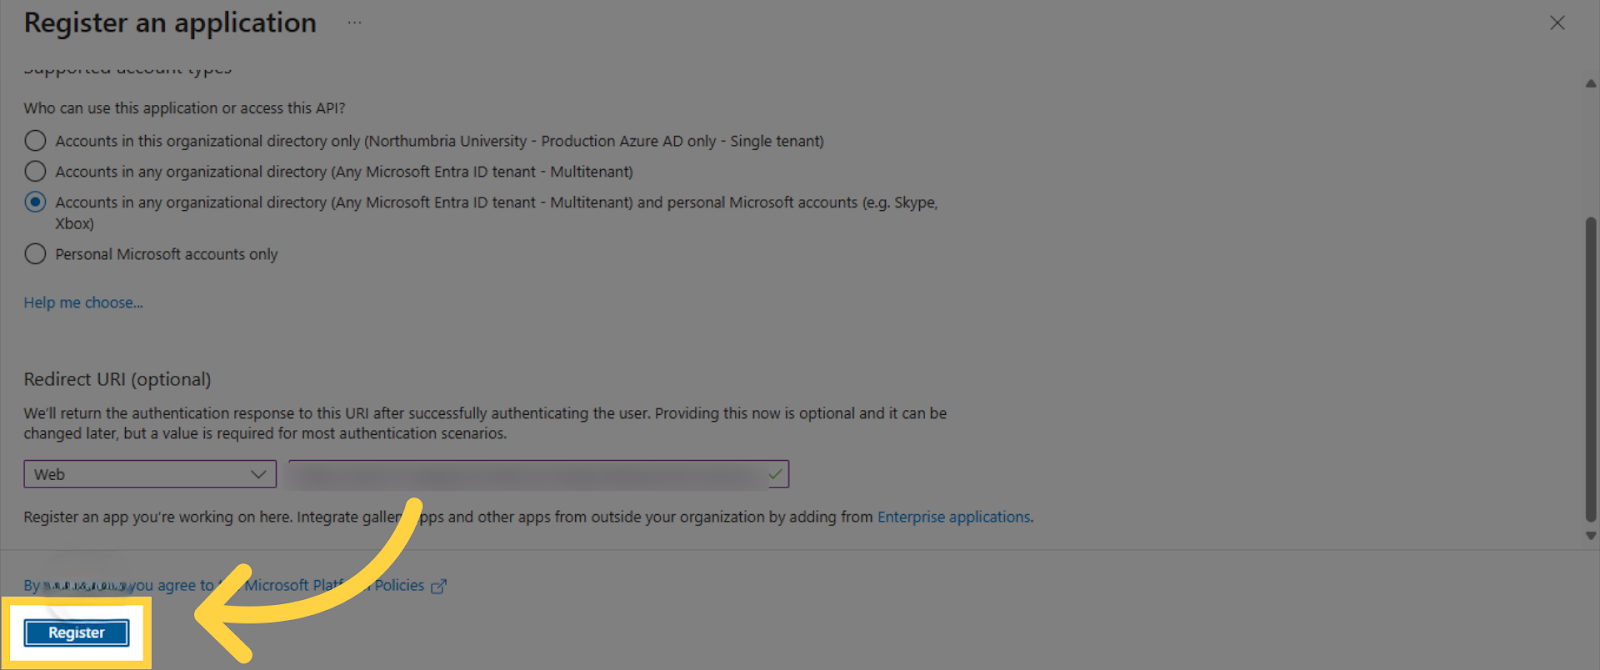
- Click on Register
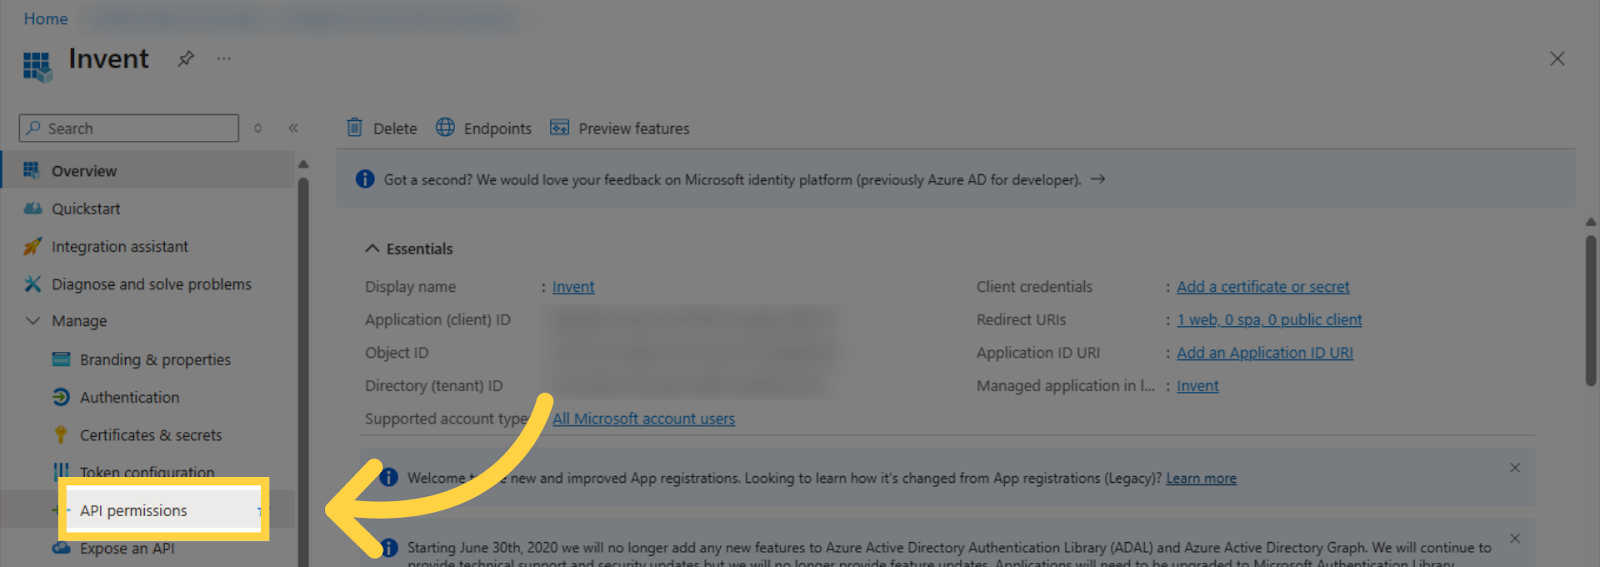
- You will be redirected to a different page. Click API Permissions
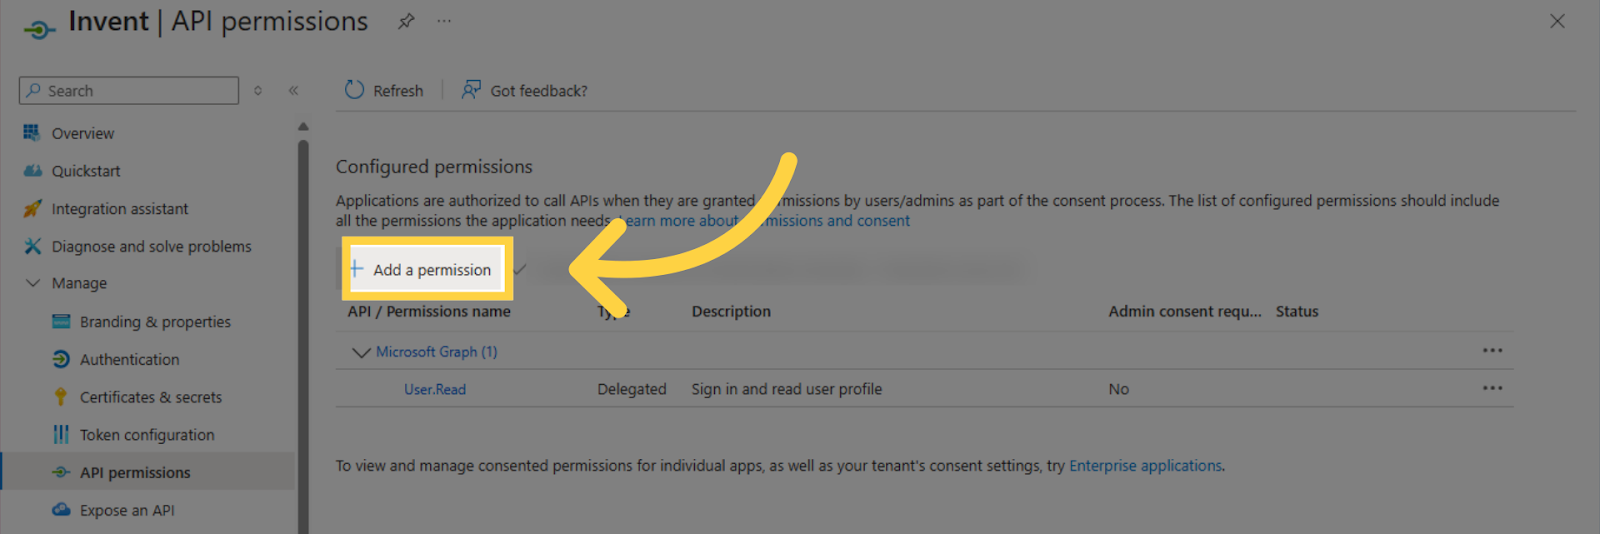
- Press Add a permission
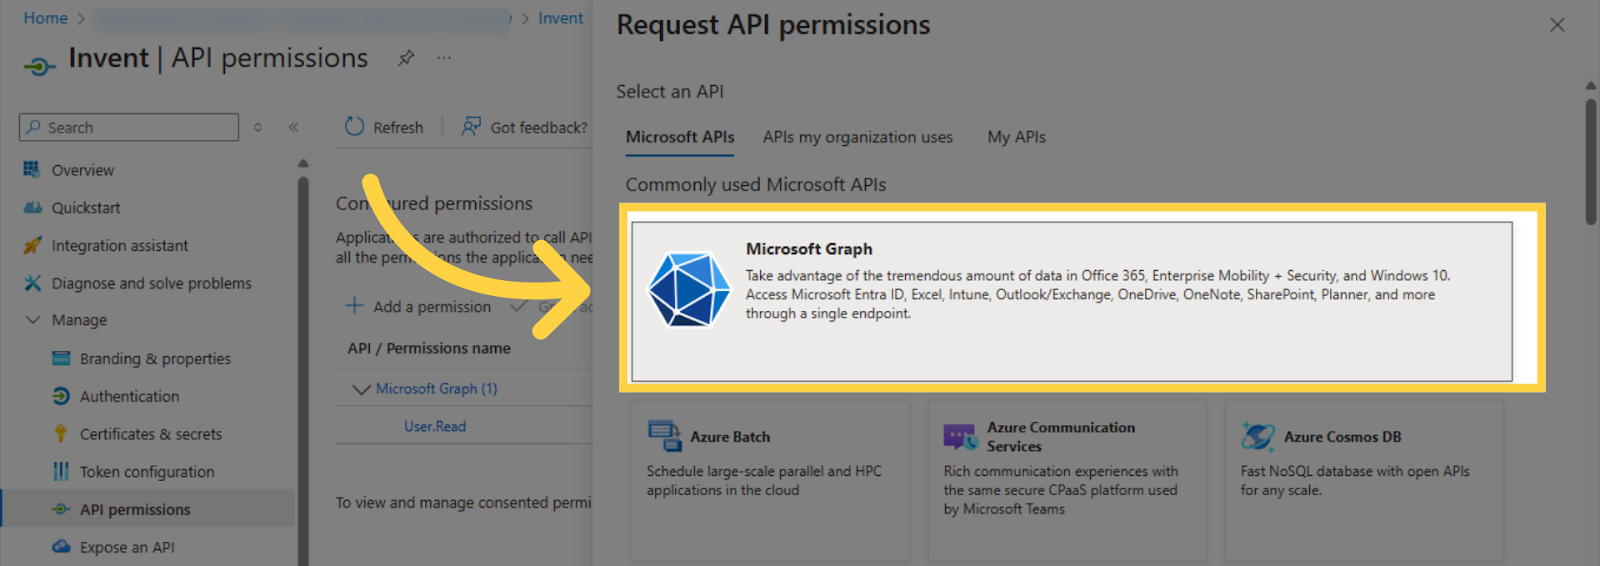
- Select Microsoft Graph
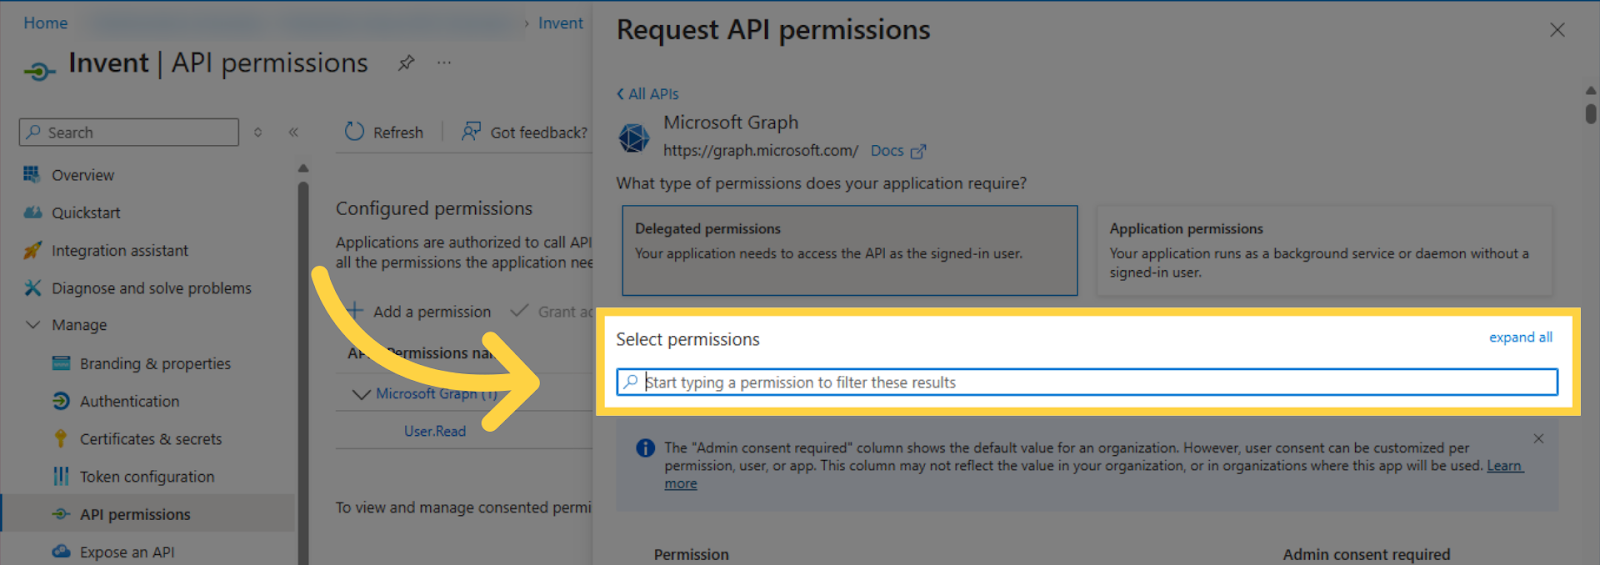
- Choose Delegated Permissions

- Under Select Permissions search for and select SMTP.Send and IMAP.AccessAsUser.All
- After selecting both permissions, click Add permissions
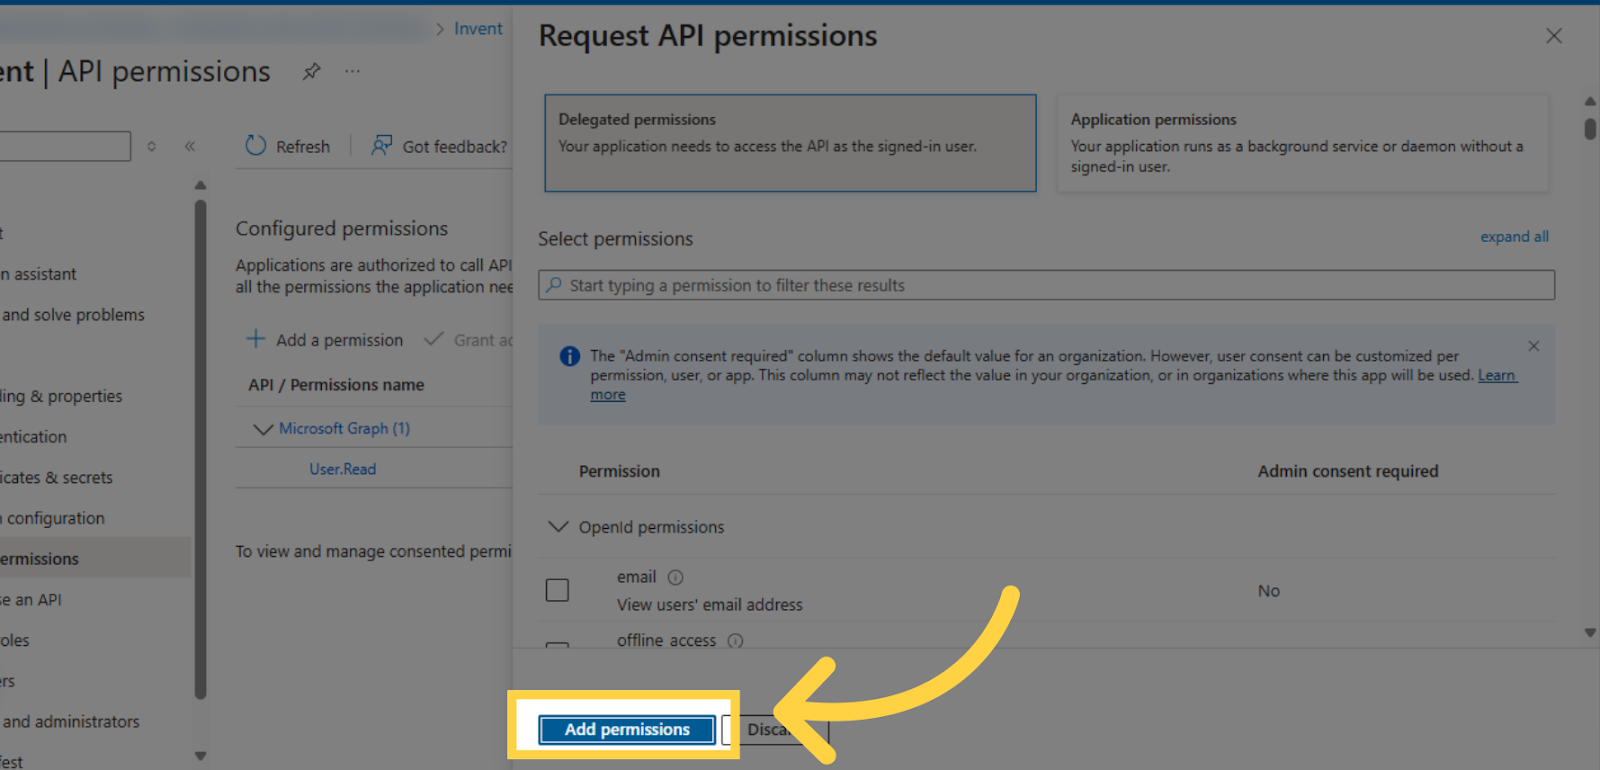
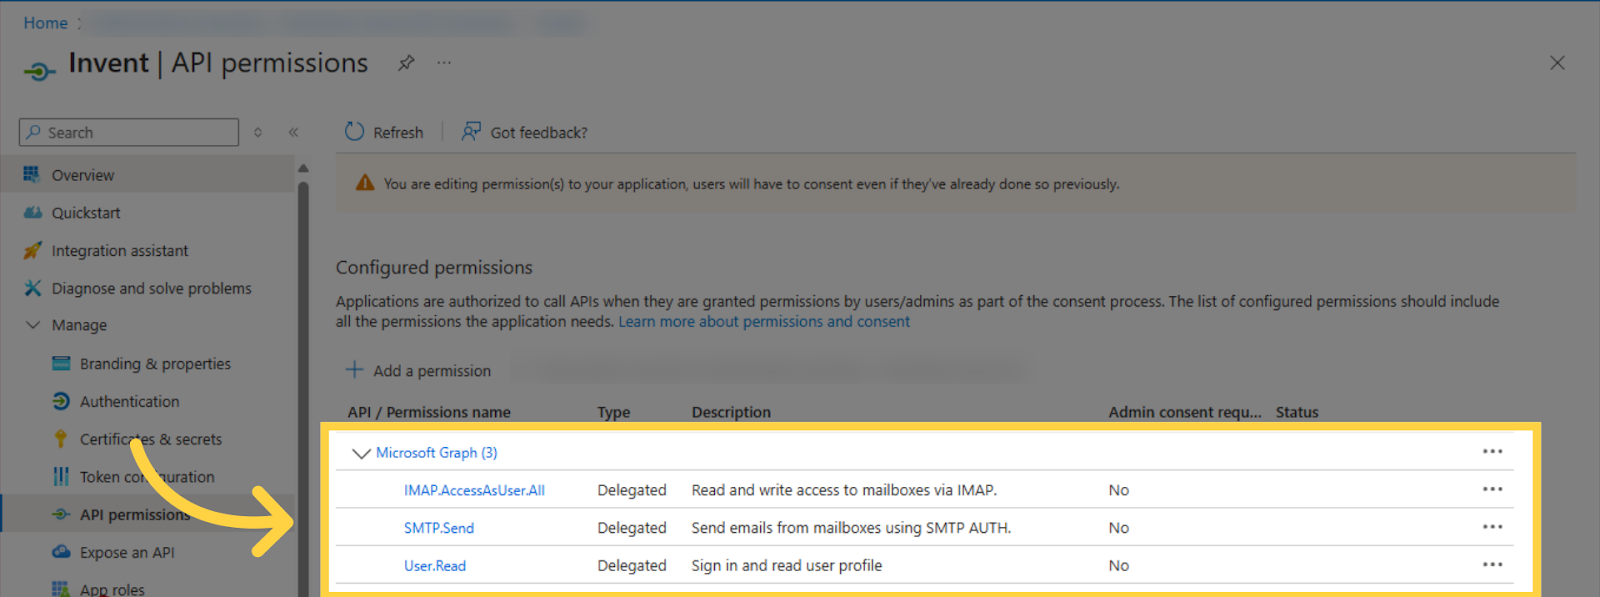
- All permission can be seen under Configured Permissions. Also, User.Read was added automatically.
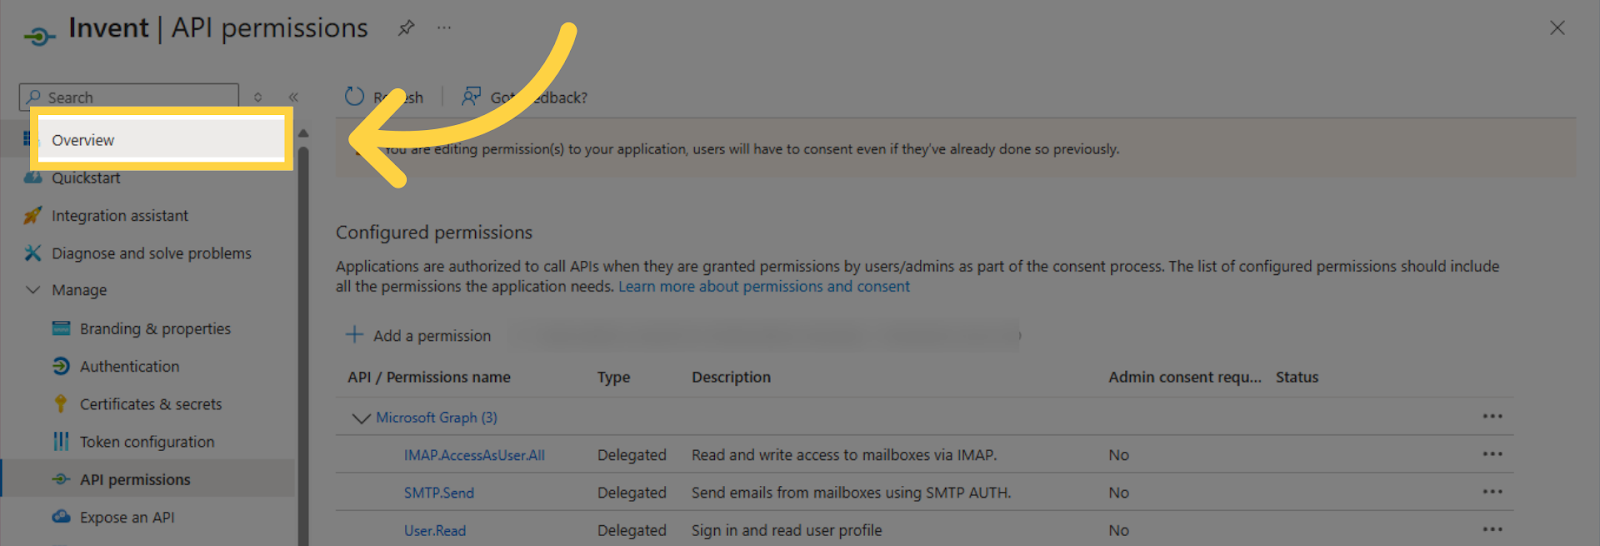
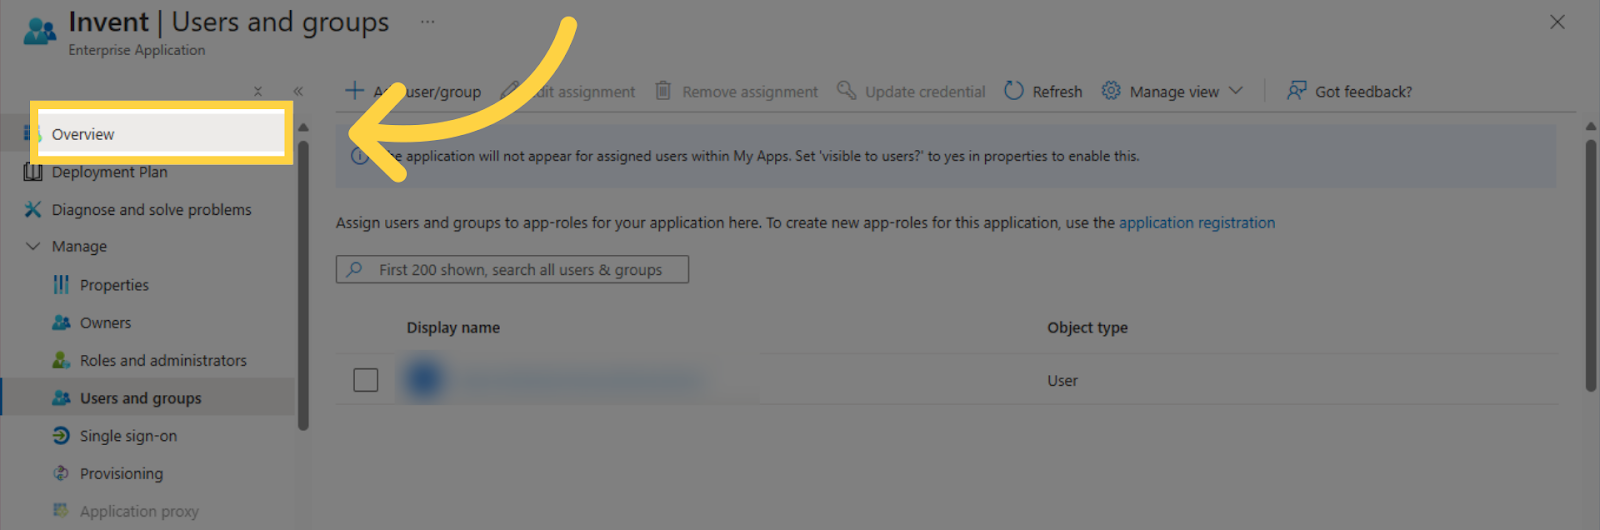
- Press on Overview
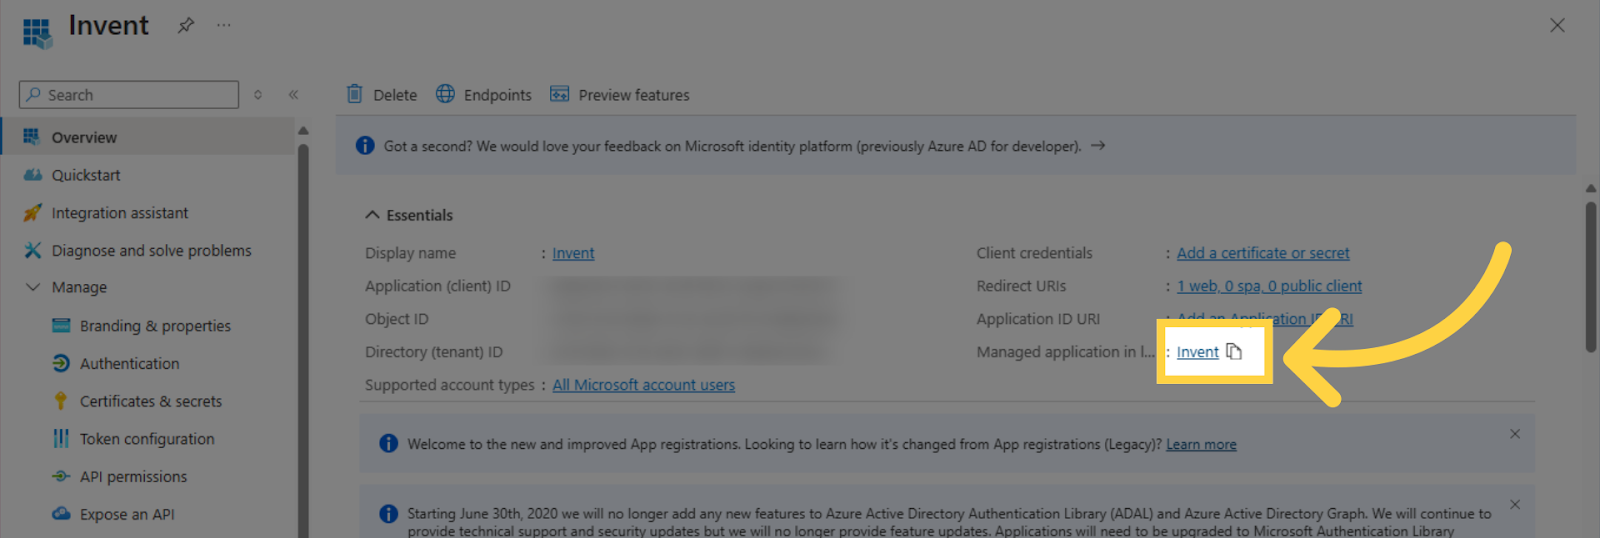
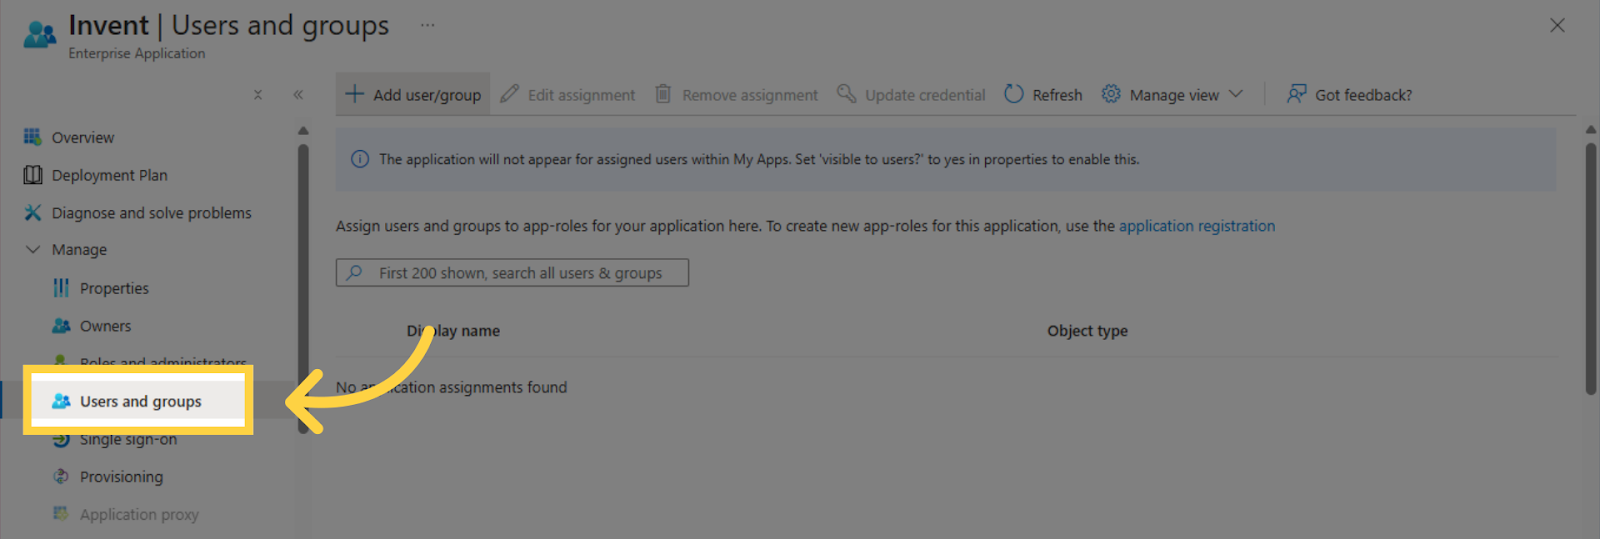
- Click “on Managed Application in Local Directory
- Choose User and groups
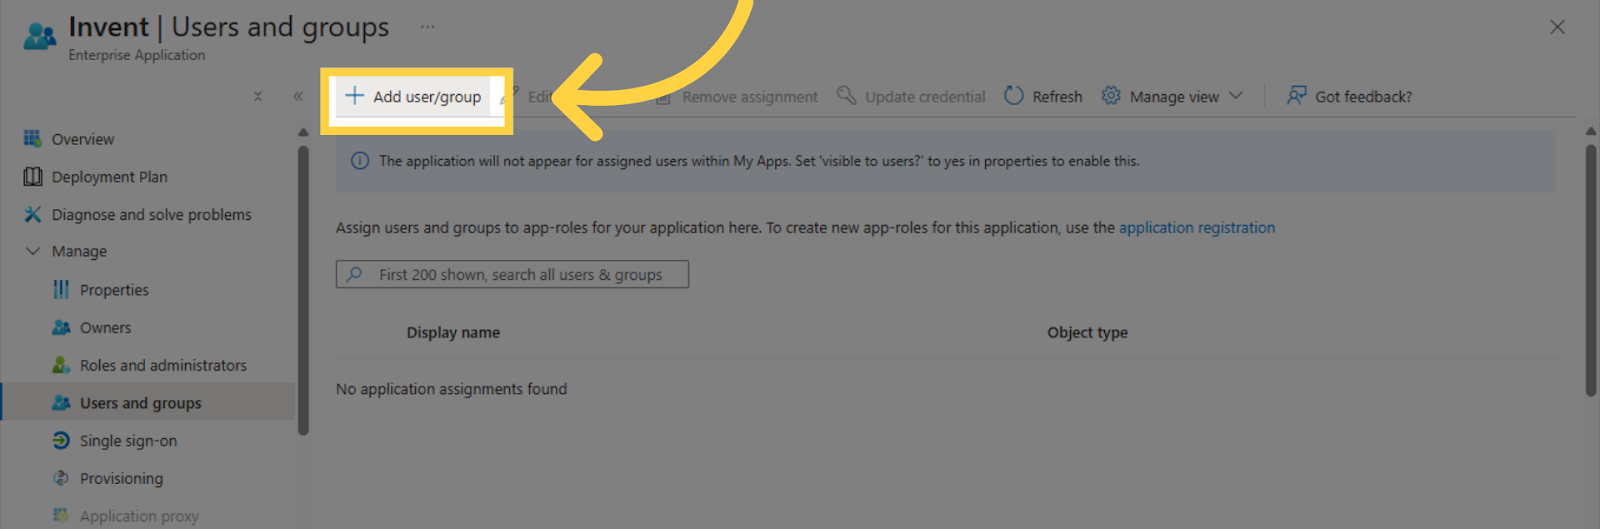
- Press Add user/group
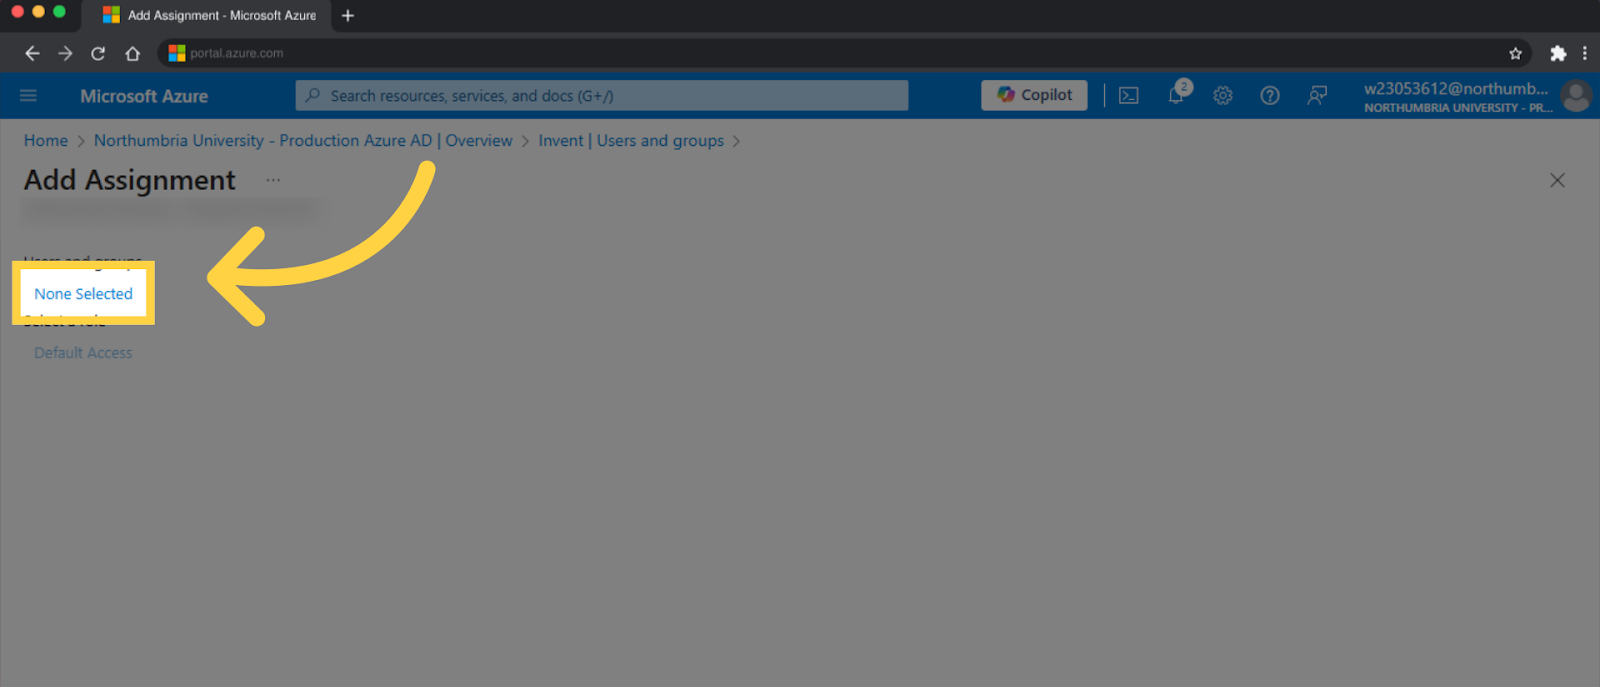
- Choose None Selected
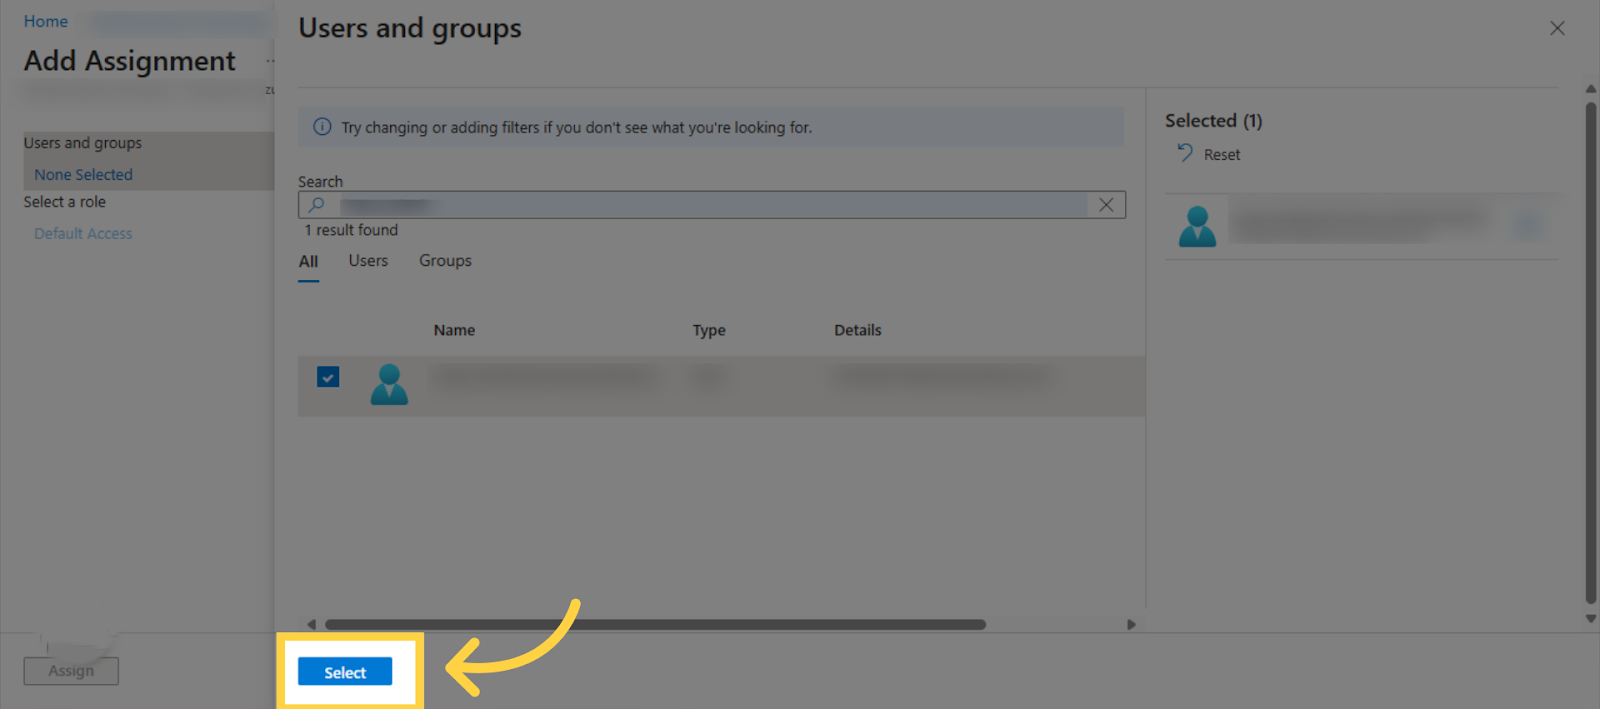
- Search for and select users/groups (These are the users that will be sending the emails)
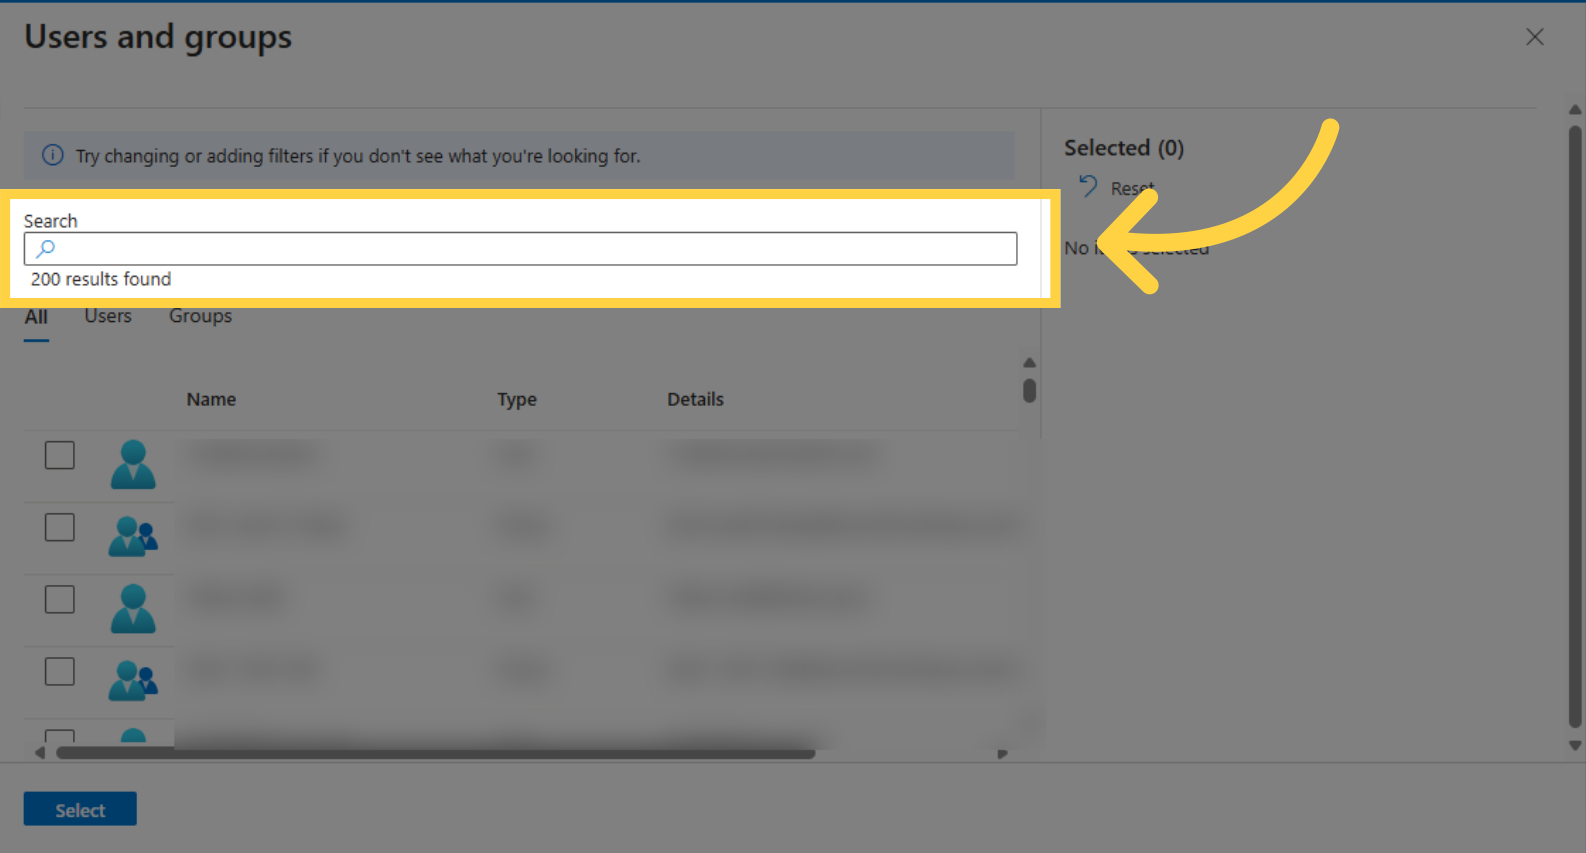
- Choose Select
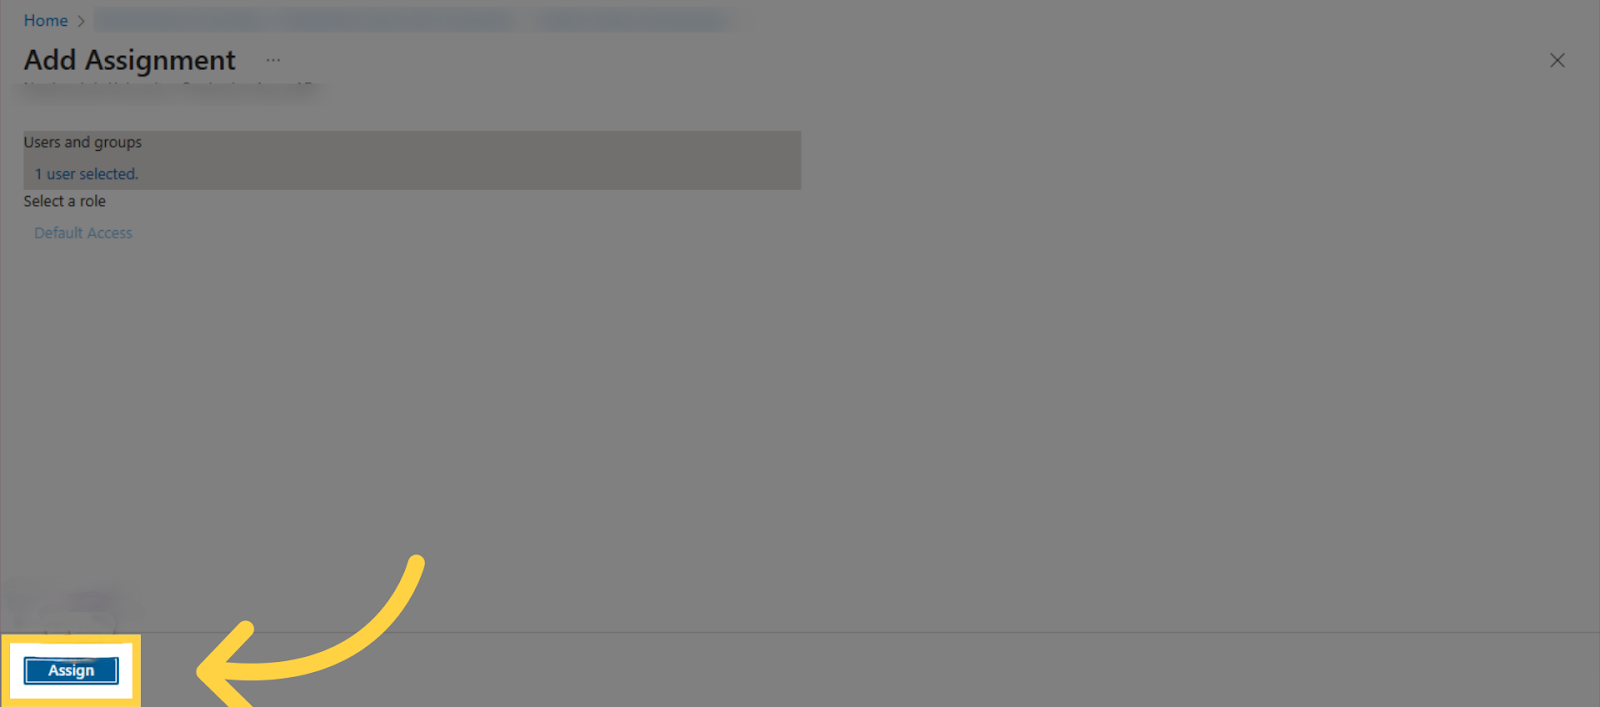
- Press Assign
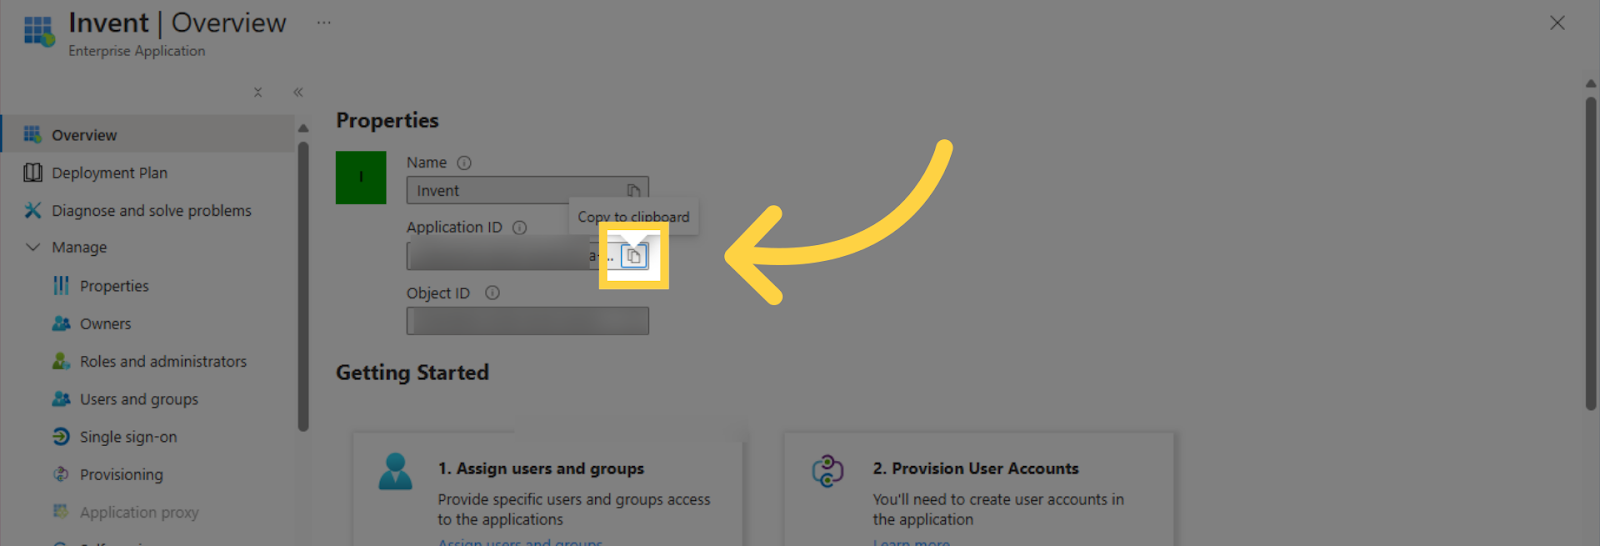
- Now click Overview
- Click Copy to clipboard under Application ID
-
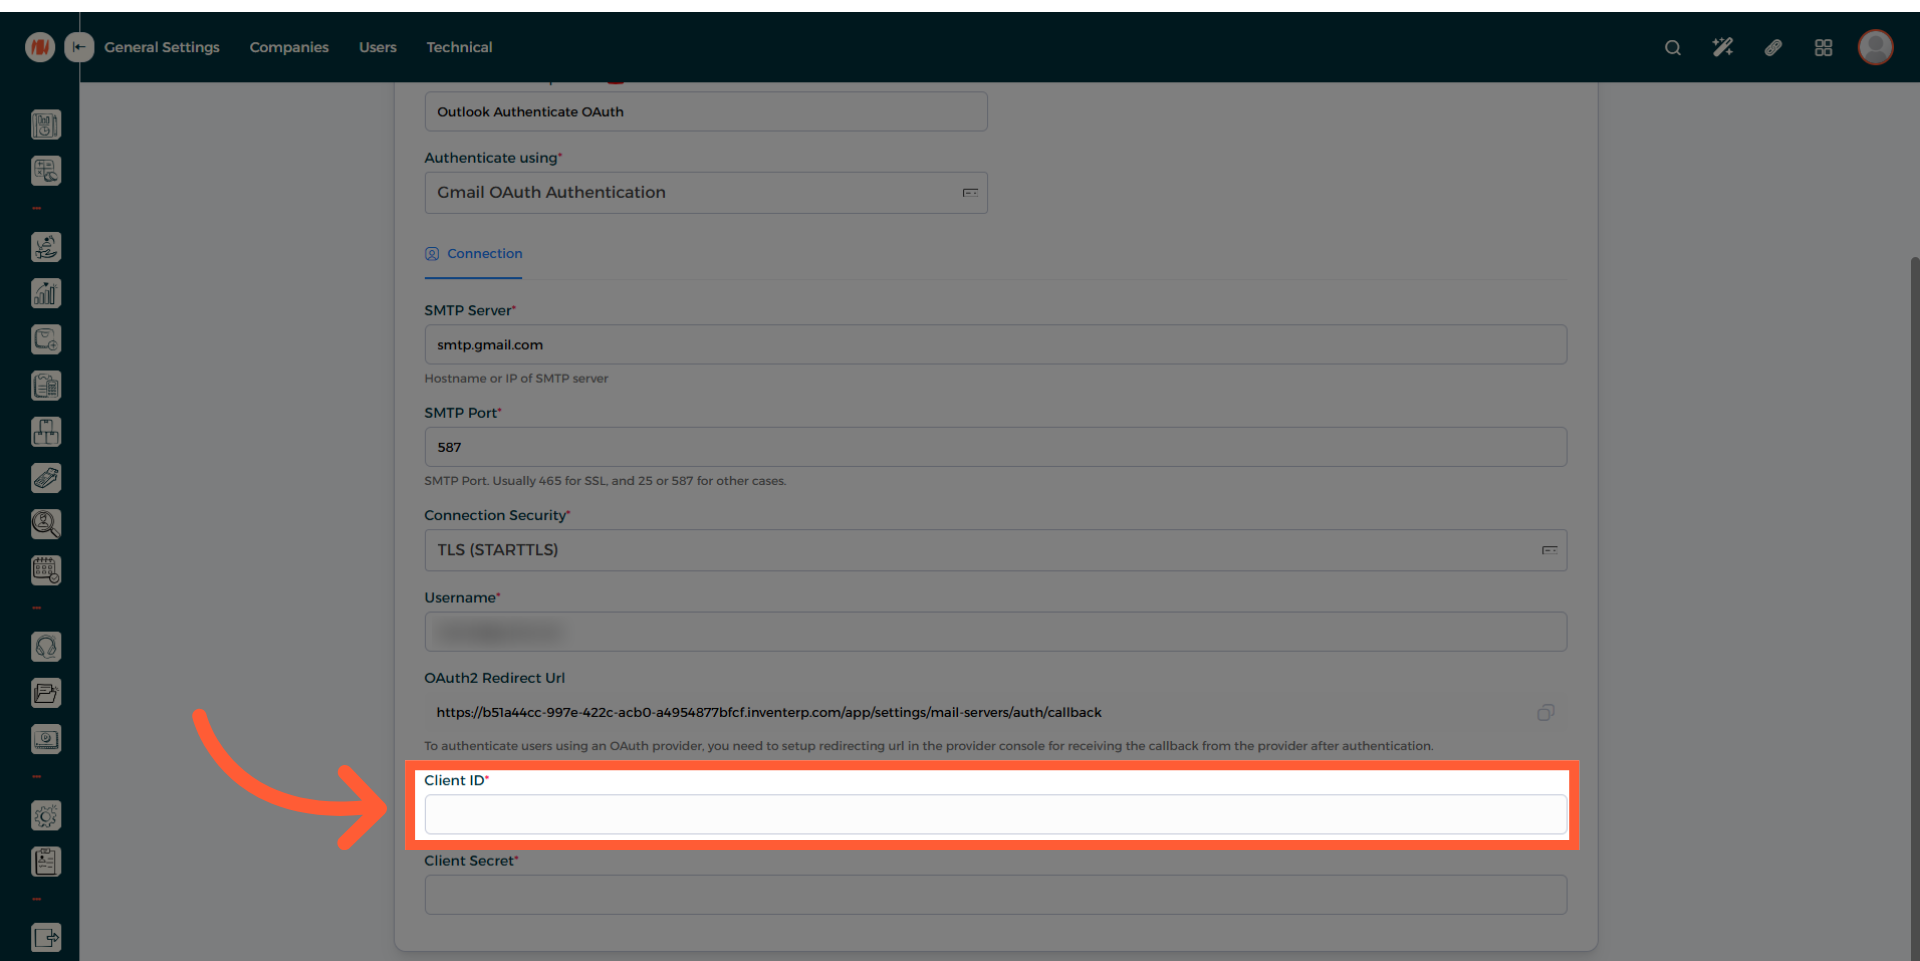
Navigate to the Invent ERP Mail Servers Page
-
Paste it in the Client ID field
-
Navigate back to Microsoft Azure
-
Click over here
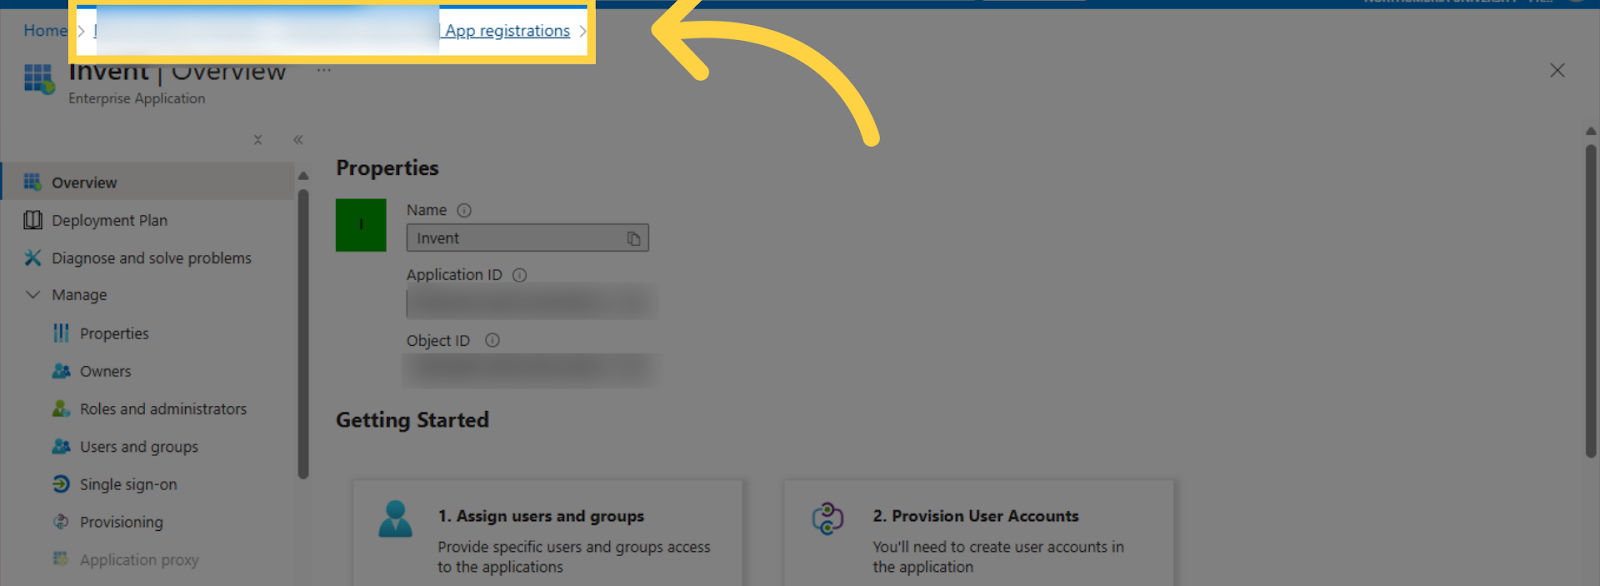
- Click on the app registration

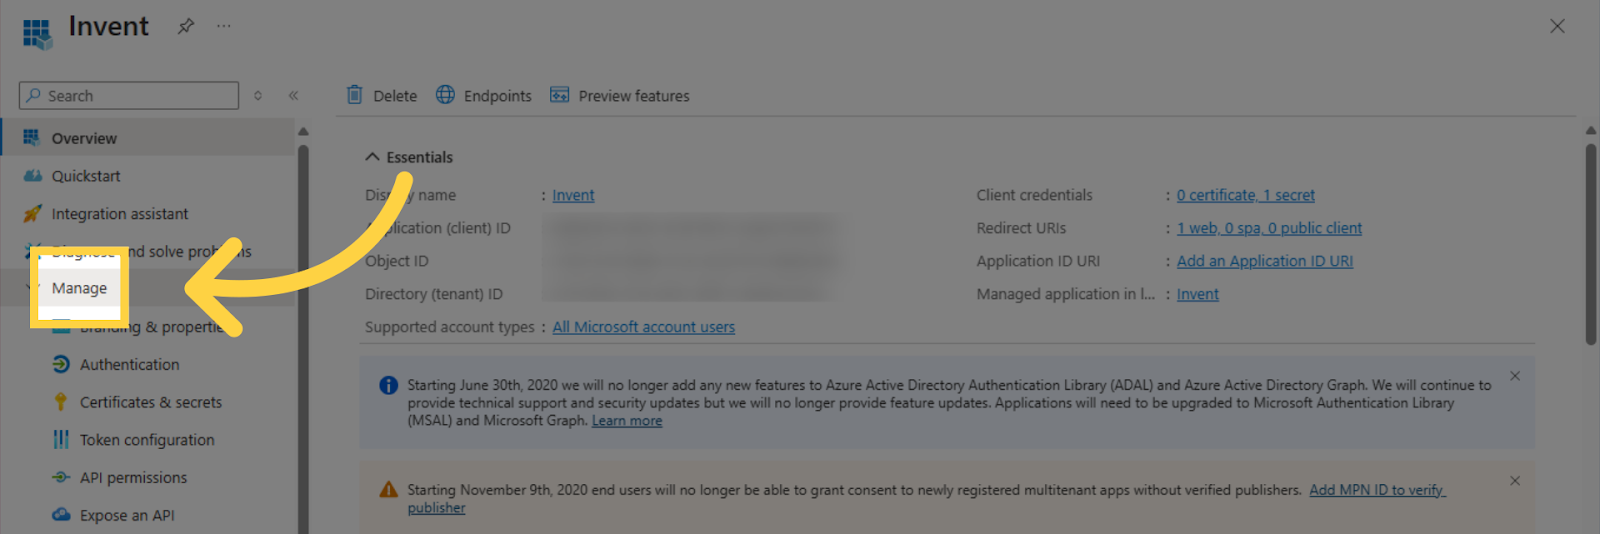
- Head to Manage
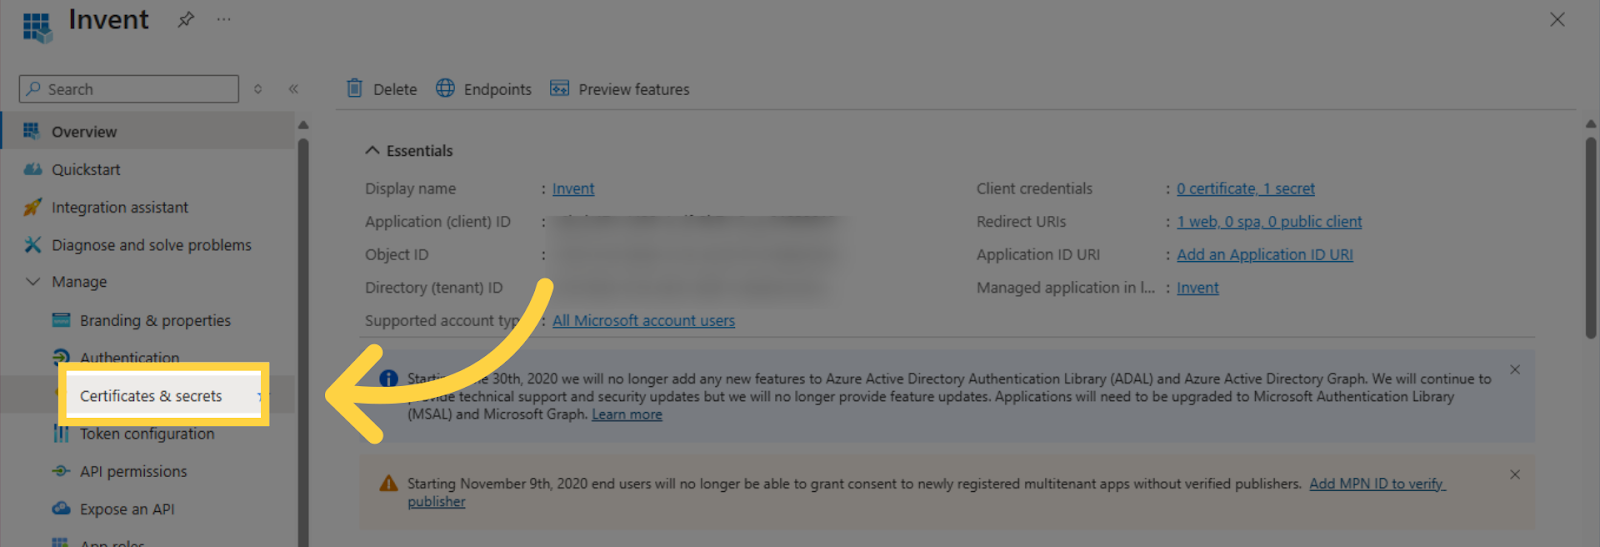
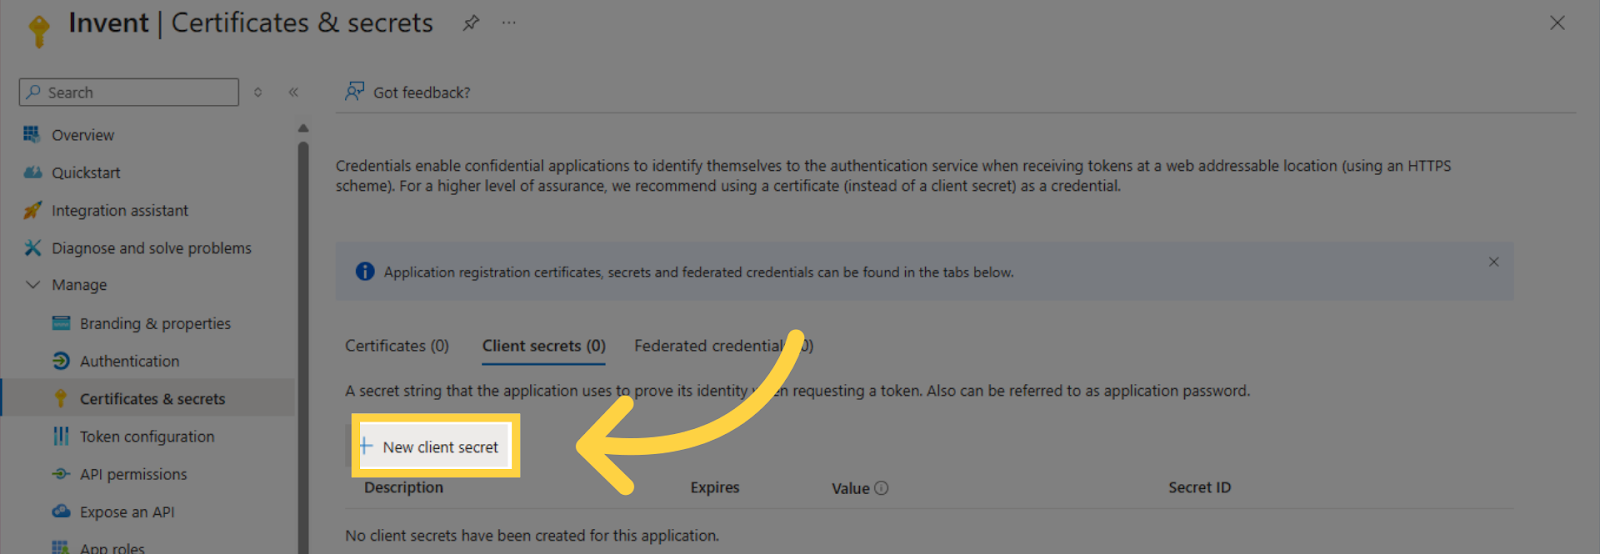
- Click Certificates & secrets
- Press on New client secret
- Enter a description
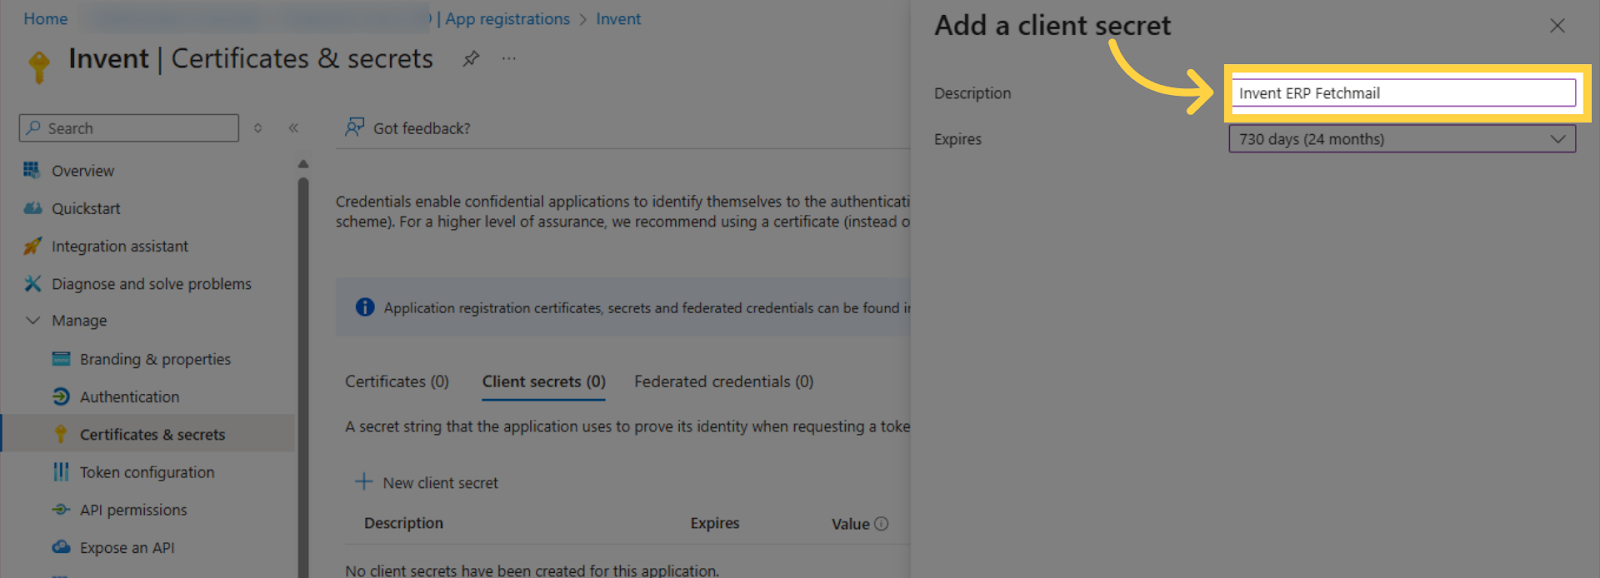
- Set the expiration date.
- Also, If this client secret expires, a new one will have to be created and configured. The expiration could lead to a service interruption highlighting the importance of the expiration date.

- Press Add

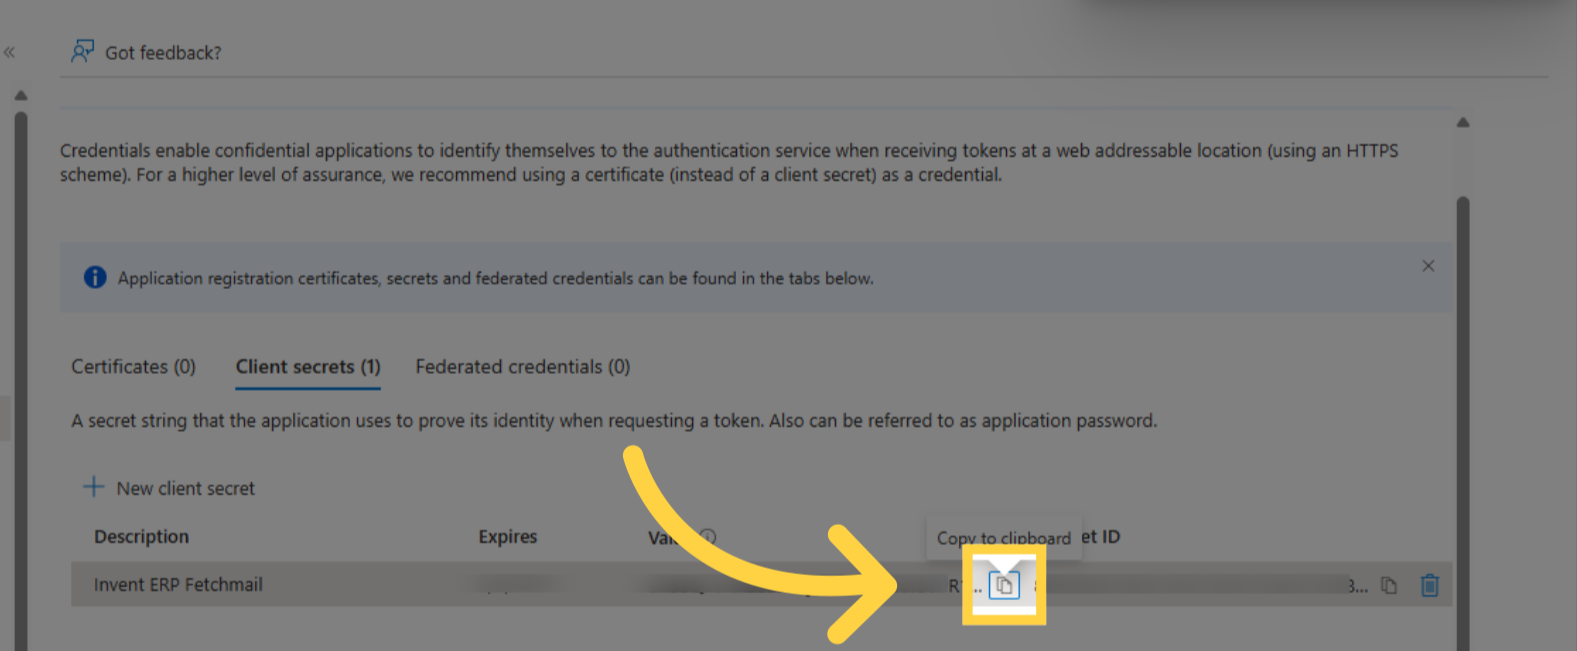
- Click Copy to Clipboard under Value
-
Navigate to the Invent ERP Mail Servers Page
-
Paste it under Client Secret
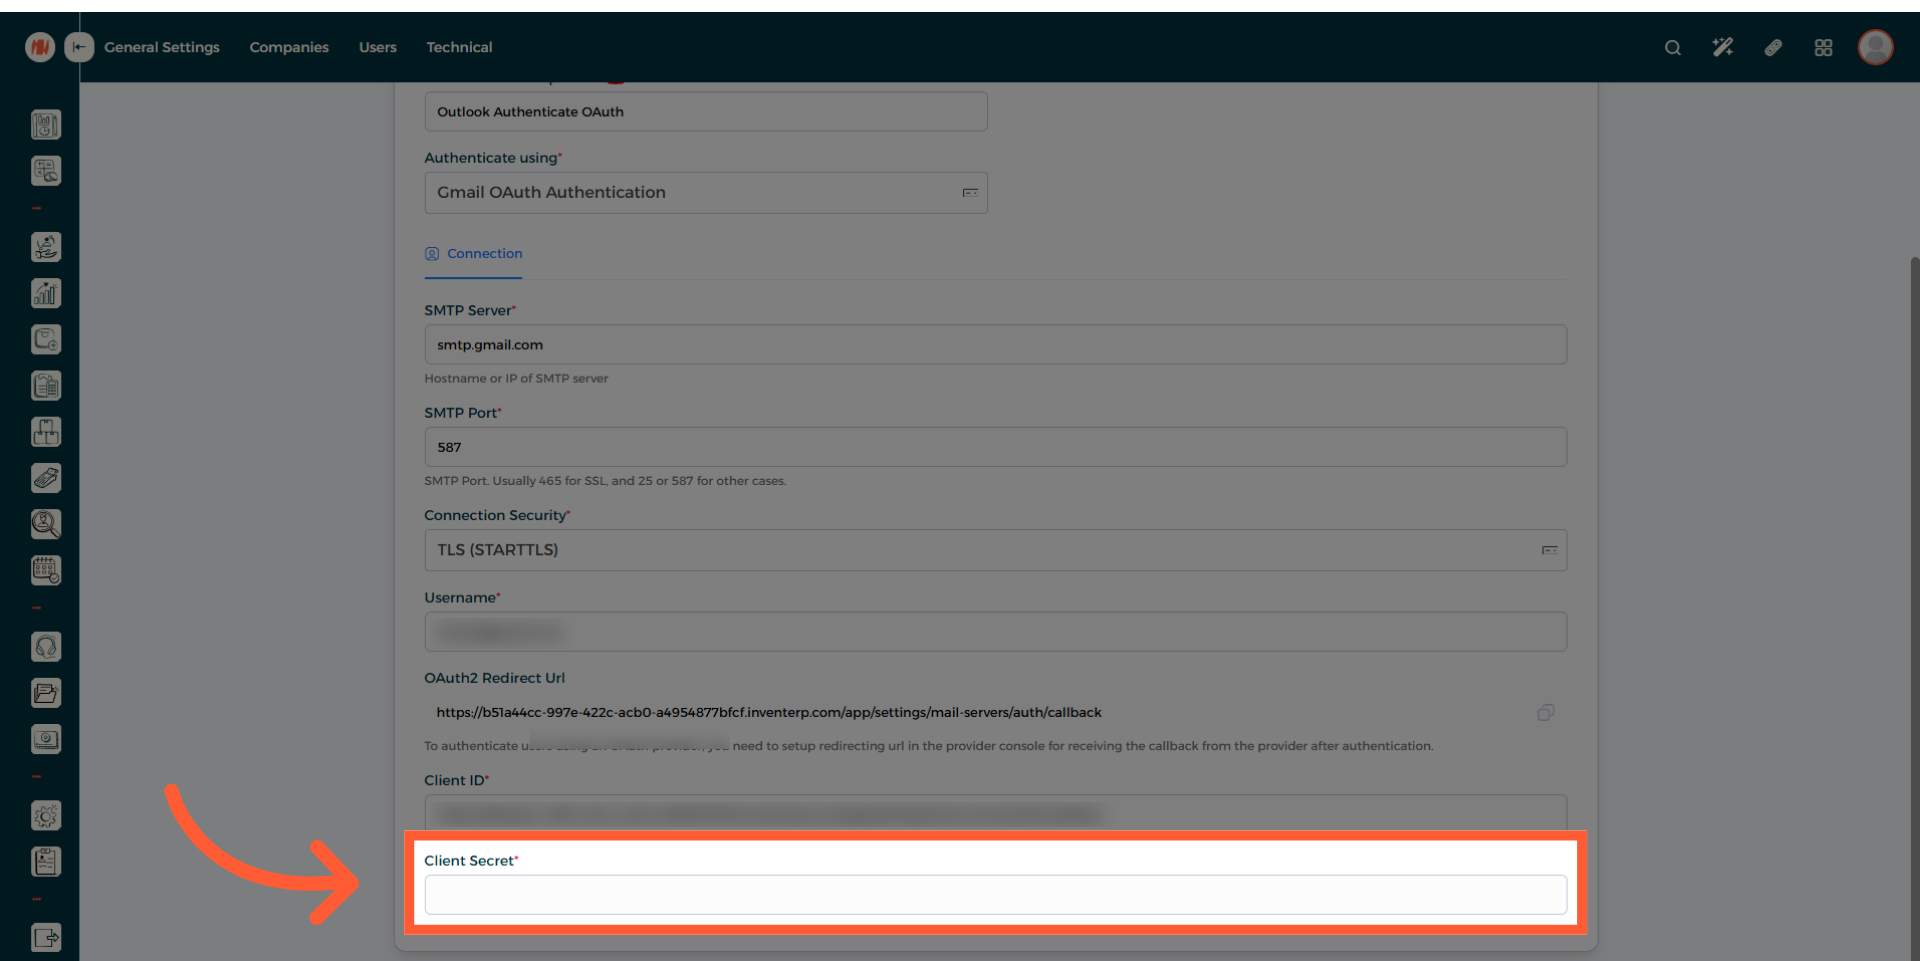
- Scroll up and click Create
- Scroll down and click Connect your Outlook account
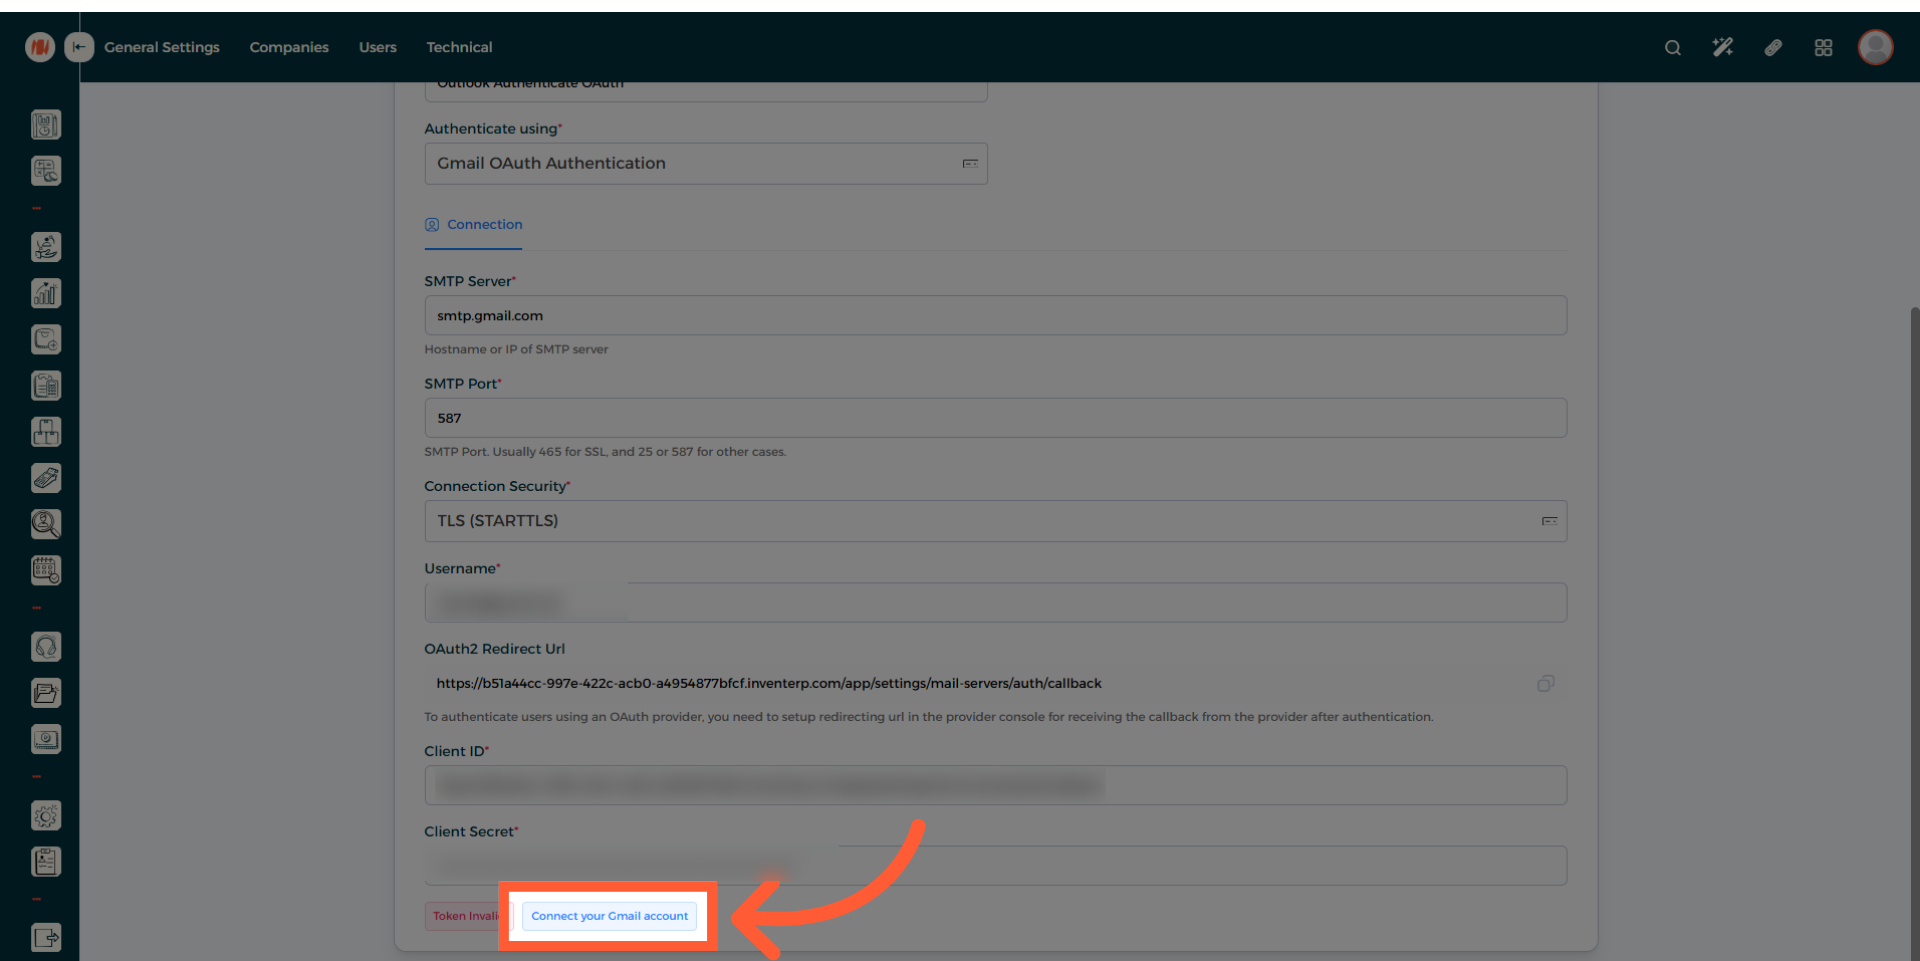
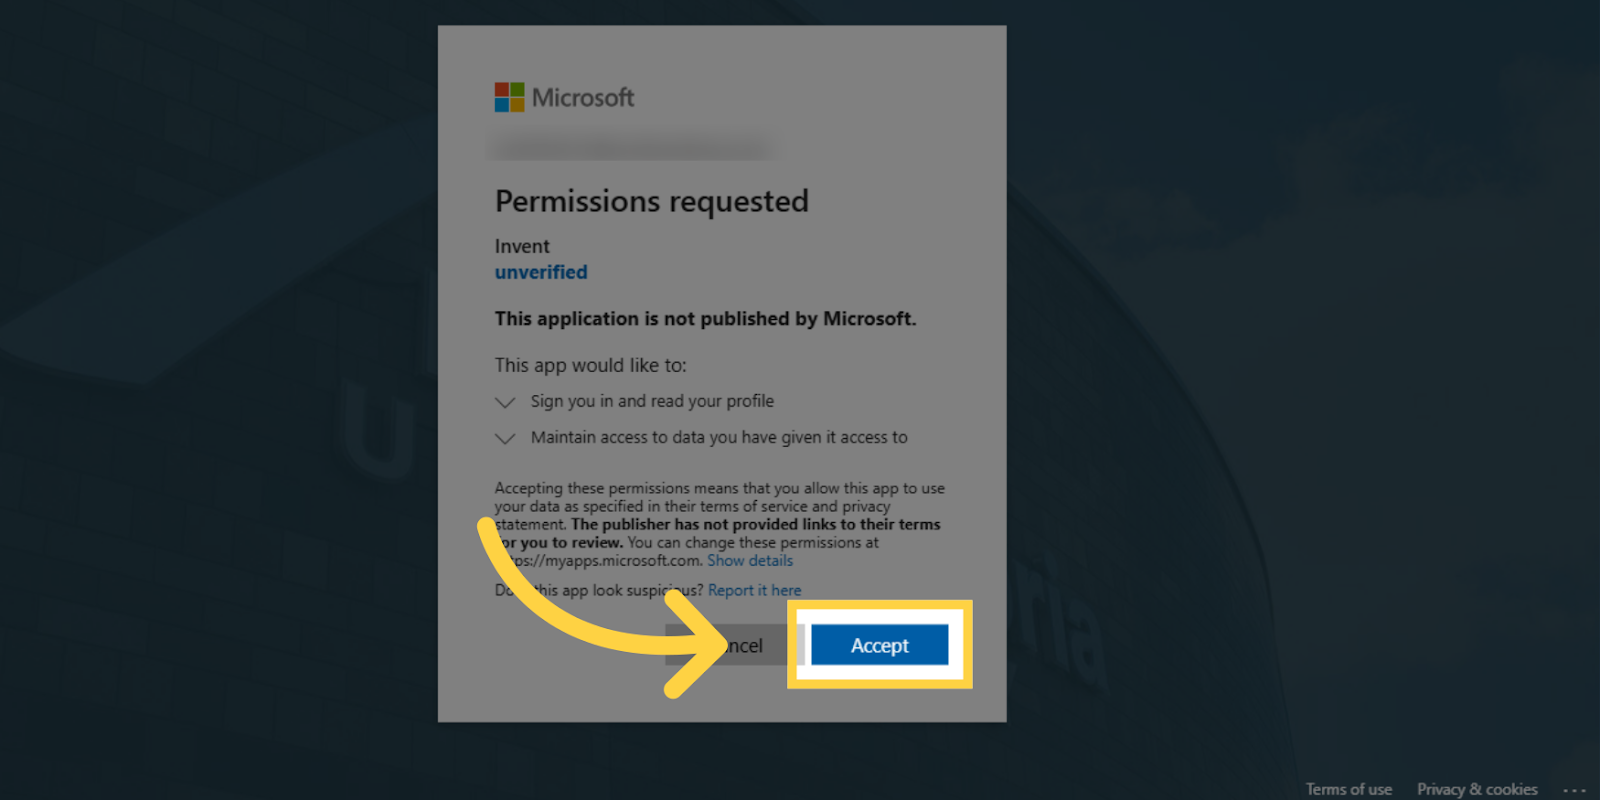
- You may receive a Permissions Request.If so, press Accept